This article is going to provide a guide on why and how to use images with transparent PNG backgrounds.
Here is a quick guide:
What is a PNG background?
Portable Network Graphics (PNG) is a lossless file format that was created as a more open alternative to Graphics Interchange Format (GIF). The major advantage of PNG over JPEG is that it has lossless compression, which implies there is no quality loss when it is opened and stored. PNG is also good at handling detailed, high-contrast pictures. PNG is frequently used in product photography because it can provide a pixel-for-pixel picture rather than compressing pixels, thus showing more details of a product.
PNG is often used in logos, line drawing or icons as well.
What tools can you use to make a transparent background?
Use Adobe Photoshop to make a transparent background.
Photoshop is the most conventional way of creating a transparent PNG background.
- The Polygonal Lasso method is great for images with straight edges.
- The Quick Selection method is good for images with round edges.
- The Brush method is best for images whose edges require more precision.
I will use the Polygonal Lasso Method as an example.
The Polygonal Lasso Tool looks like this:![]()
Once selected, click on a starting point, and trace the part of the image you want to keep using a series of clicks from point to point. Connect the line with your starting point. Once you connect the starting point again you will see a flashing dashed line, and then click “Select” and then click “Reverse” if necessary to define the part you want to keep or remove. Finally, hit “Delete” and save it as PNG.

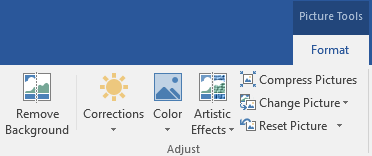
Use Power Point to make a transparent background.
In Word, PowerPoint, and Excel, you can remove the background from a picture to highlight the image’s subject, or remove distracting detail. To remove the background, select the picture. Select the Picture Tools > Format tab, and then select Remove Background.
Use PowerPoint on Mac to make a transparent background.
- Select the picture. On the Picture Format tab of the ribbon, select Remove Background.
- If you don’t see Remove Background or the Picture Format tab, make sure that you’ve selected a picture. You might have to double-click the picture to select it and open the Picture Format tab.
- The default background area is colored magenta to mark it for removal, while the foreground retains its natural coloring.
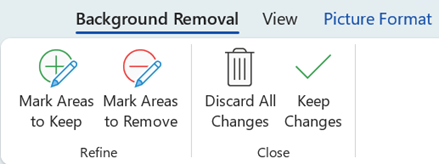
- If the default area isn’t correct, under Picture Tools, on the Background Removal tab, do one or both of the following:
- Select Mark Areas to Keep and use the free-form drawing pencil
 to mark the areas on the picture that you want to keep.
 - Select Mark Areas to Remove and use the drawing pencil to mark those areas to remove.
- When you’re done, select Keep Changes or Discard All Changes.To save the image in a separate file for later use, right-click the image and select Save as Picture.
Use PowerPoint on Windows to make a transparent background.
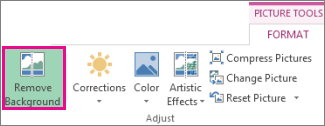
Select the picture that you want to remove the background from.
Under Picture Tools, on the Format tab, in the Adjust group, select Remove Background.
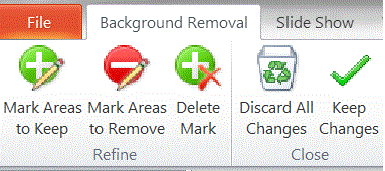
Click one of the handles on the marquee lines and then drag the line so that it contains the portion of the picture that you wish to keep, and excludes most of the areas you wish to remove.

You can sometimes get the result you want without any additional work by experimenting with the position and size of the marquee lines.
To undo marked areas, select Delete Mark and then select the line.
If the default area isn’t correct, go to Background Removal > Picture Tools and do one or both of the following:
Select Mark Areas to Keep and use the drawing pencil to mark the areas on the picture that you want to keep.
Select Mark Areas to Remove and use the drawing pencil to mark those areas to remove.
When you’re done, select Keep Changes or Discard All Changes.To save the image in a separate file for later use, right-click the image and select Save as Picture.
If you need any video guidance, here is one for your reference.
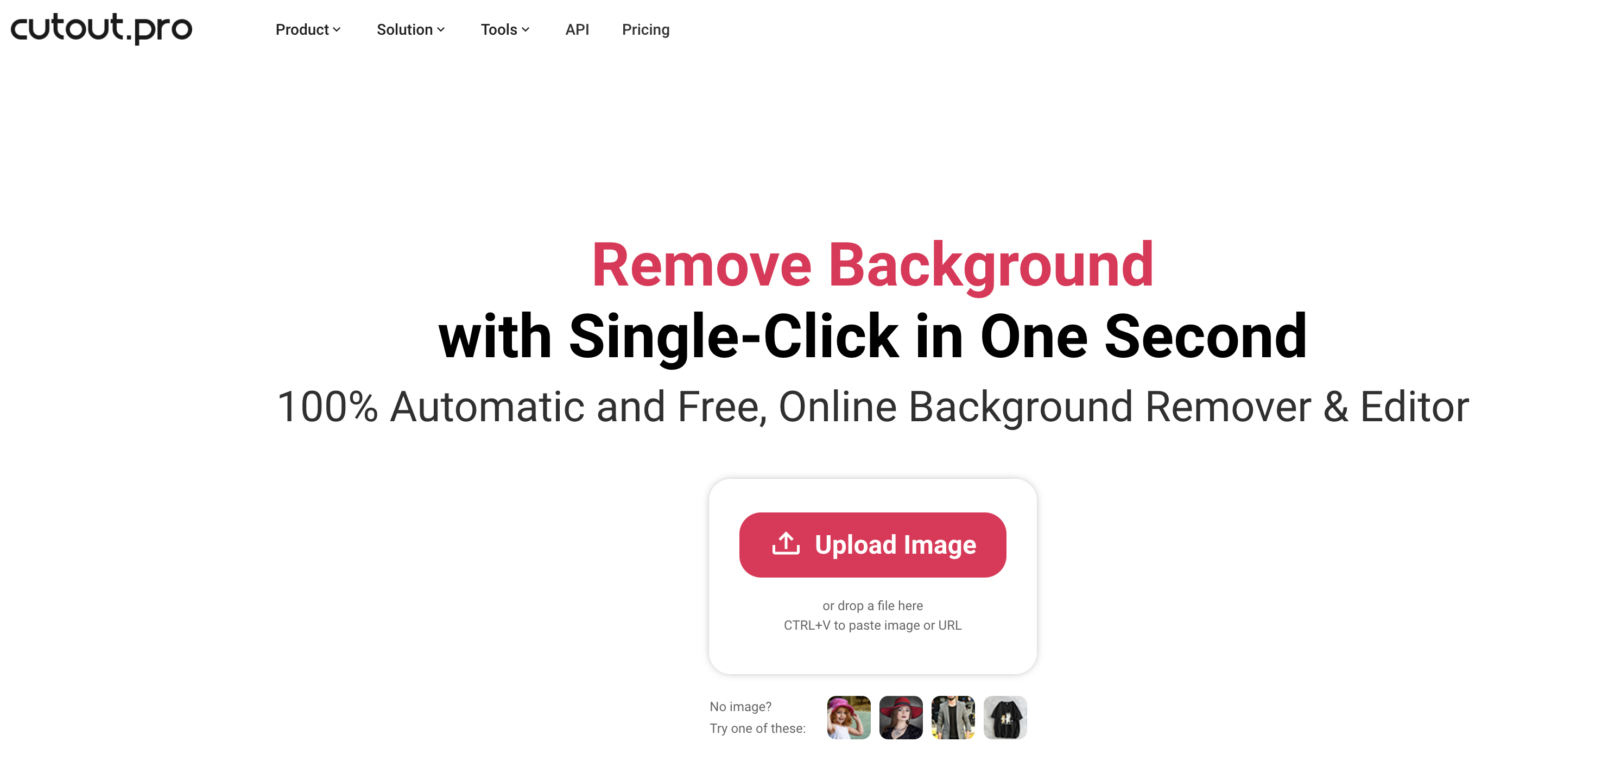
Using Cutout.Pro to create transparent PNG background.
Go to the website Cutout.Pro to open its online background remover. This tool is specializing in removing photo backgrounds with AI algorithms and is free for the low-resolution small-size results.
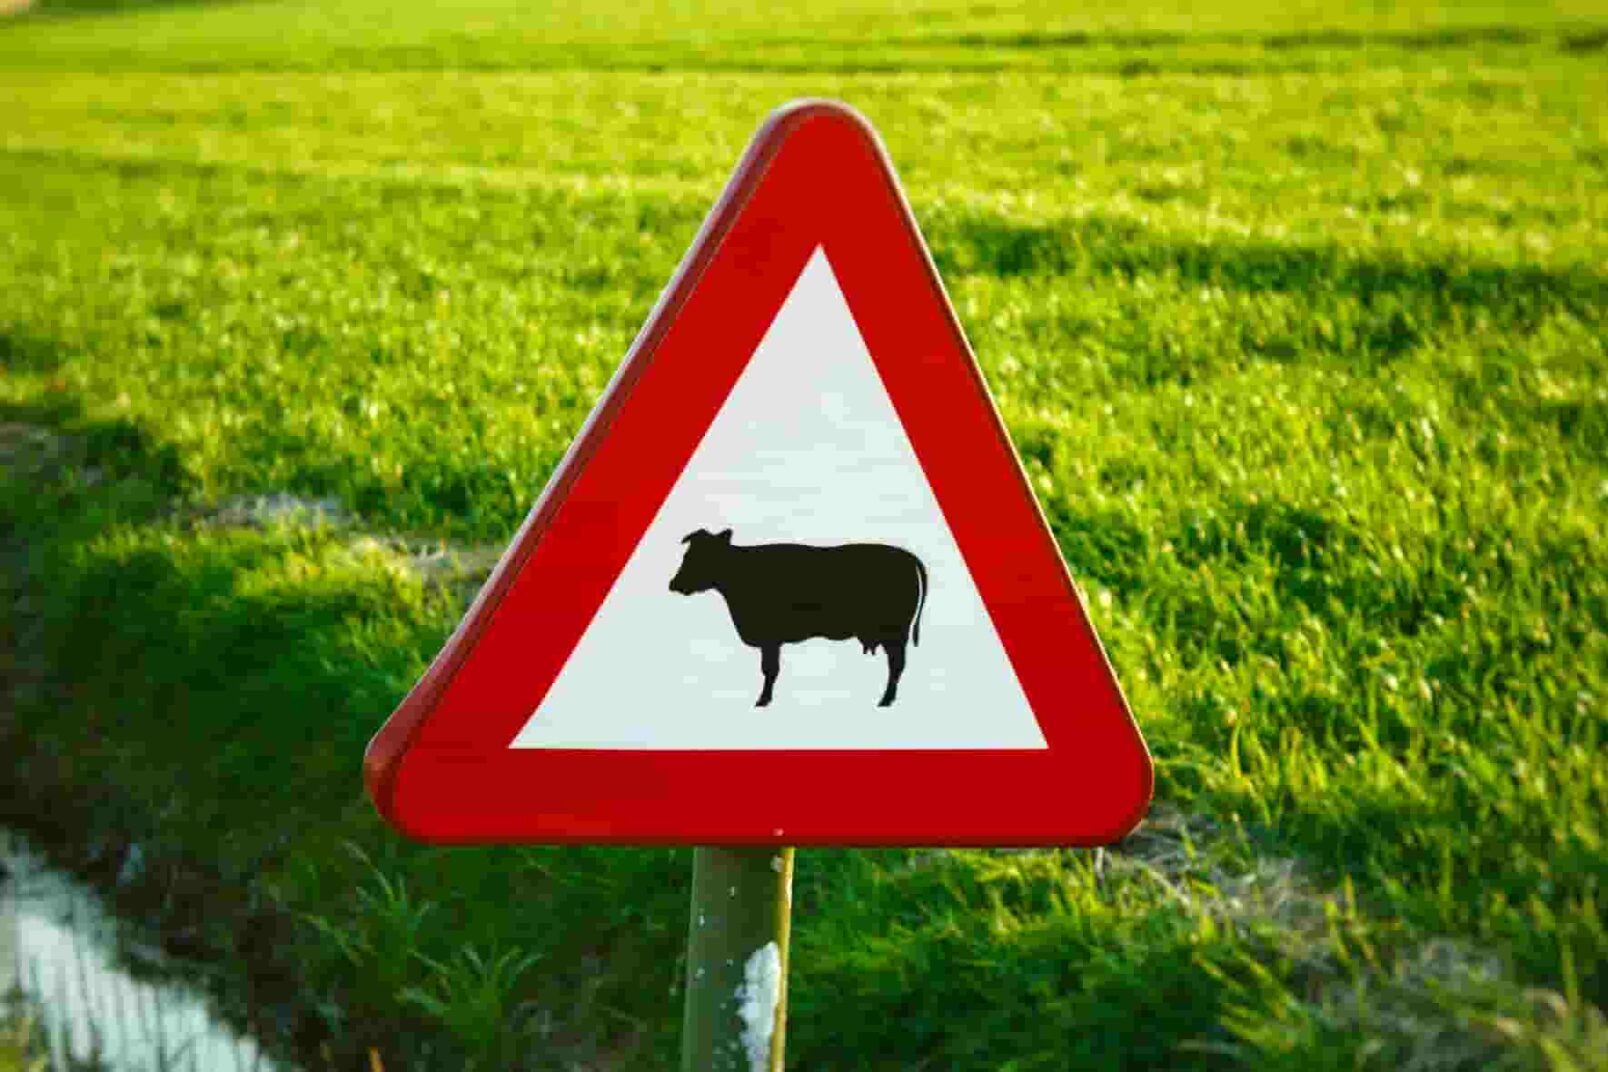
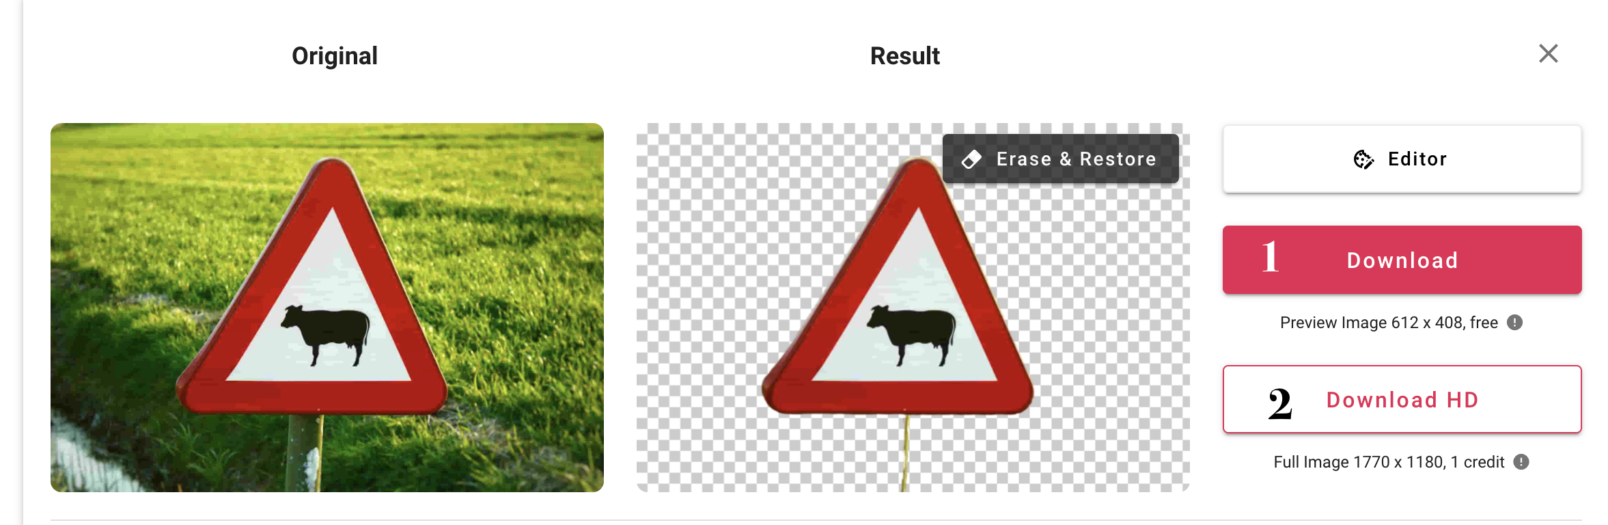
Upload the image you want to process. For example the one below.
This online tool will automatically create a PNG file with transparent background. Press 1 for Free or register to download the HD version. You normally get 1 credit Free if you register.
Of course, there are other ways for you to achieve results such as finding an expert on Fiverr, but it just takes time and more money to do so.
old family photo old family photo old family photo old family photo
- Sell Photo Prints Online: 5 Tips Help You Win the Game
- Cutout.pro x Teeinblue – Partnership Announcement
- (2) Top 8 AI Outpainting Tools: What Will Be Outside the Picture Frame?
- (1) What is the Outpainting Feature of AI Art Generation: Past, Present, and Future
- Transform Sketches into HD Anime Room Wallpaper: A Simple Guide Using a Tool (Free, 4K)