Have you ever spent way too long trying to trace around hair or a handle? I’m right there with you. I’m Camille, a content creator specializing in digital visuals and e-commerce design. These days, when I need to remove background online for social covers, e‑commerce shots, or quick avatars, I lean on AI tools first, then do tiny touch-ups only if the edges ask for it.
I’ve been testing background removers regularly through last year and into January 2026 (remove.bg Web and API, Adobe Express, Canva’s BG Remover, and Pixelcut). Across client projects and my own shop images, the pattern is clear: good input photos + a 2–3 minute refinement pass = pro-looking cutouts that don’t feel generic. Let me show you what actually works, what still trips up the edges, and how I export clean PNGs without the dreaded fringe. Beginner friendly, go ahead!

How AI Background Removers Work in 2026 (Quick Explainer)
The short version: modern background removers use segmentation models trained on a lot of real-world images, not just flat product shots. In 2026, most decent tools combine semantic segmentation (to understand “this is a person/shoe/plant”) with matting (to preserve soft edges like hair and fur). Some also do a quick color decontamination pass so edges don’t glow.
In my January 2026 tests, quality felt consistent across the big names for simple subjects. Differences show up when details get tricky, flyaway hair, translucent fabric, glassware. Tools that mention “alpha matting” or “refine edge” usually hang on to more micro detail, especially in hair and lace. API-based options (like remove.bg’s API) also let devs predefine background colors or compose new scenes server-side, which is lovely for batch e‑commerce workflows.
Why this matters in practice: understanding what the model is good at helps you shoot smarter. High contrast and clear edges give the algorithm a strong hint. And when it guesses wrong (it happens), you’ll know exactly what to tweak without spiraling into pixel-pushing. Past me was so serious. Now I adjust once and move on, there we go!
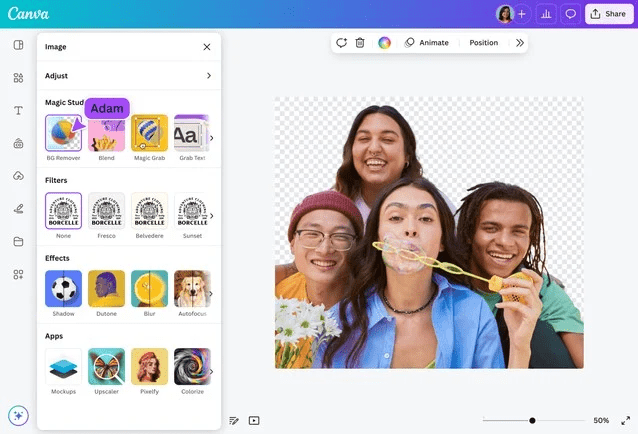
When dealing with complex edges or batch images, I usually use our own productCutout.Pro to simplify the process. This enables me to spend more time on creation rather than repeatedly trimming the edges. Try Cutout.Pro for free — upload your photo and create a clean result in seconds.

Next, let’s take a look at the specific operation steps…
Best Photos for Perfect Cutouts
Lighting and Contrast Tips
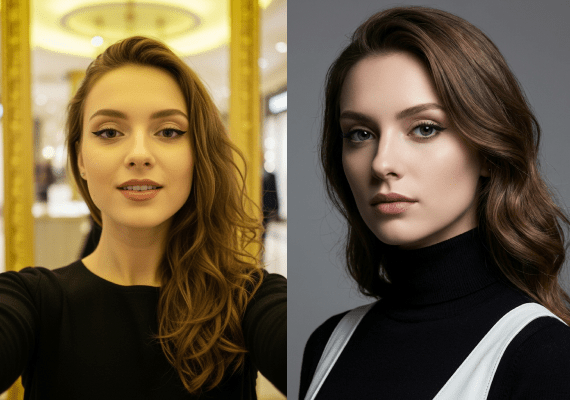
If you can, give your subject gentle, even light. I like a soft key from one side and a fill from the other, enough to define shape without harsh shadows. Avoid shiny hotspots that blow out to pure white: AI sees those as “edge confusion.” For people shots, backlight + a simple rim can help hair read as separate from the backdrop.
High contrast helps: dark subject on lighter background or vice versa. When I shot matte black headphones against a medium-gray sweep, the cutout took 8 seconds and needed zero cleanup. Same headphones against a cluttered desk? The tool kept grabbing the cable nest. Hehe, nice when it works.
Background Choices That Improve Accuracy
Clean, non-reflective backdrops are your friend: paper, fabric, foam board. Patterned textures can be okay if they’re soft and out of focus. Avoid translucent or mirrored surfaces unless you want an artsy challenge. The more the background “reads” as background, the less the model hesitates.
E‑commerce note: place products a few inches away from the background to reduce hard, attached shadows. A bit of separation means the remover doesn’t have to decide if the shadow is “product” or “environment.” And just like that… your cutout looks in-camera clean.
Step-by-Step: Upload → Remove → Refine → Export
Upload and Auto-Removal
When I remove background online, I start in the browser for one-offs (Canva/Adobe Express/remove.bg). Drag, drop, sip tea. The AI runs instantly, usually under 5–10 seconds for 3000px images. If I’m doing 50+ SKUs, I switch to an API to batch it (remove.bg API shaved a 40‑image set to ~3 minutes total in my December test, cut the time in half, double the wow factor).
Tip: upload the highest reasonable resolution (2000–4000px on the long edge is plenty for social and storefronts). Overly tiny files tend to produce jagged edges: massive files can be slow with little visual gain.
Manual Edge Refinement (If Needed)
Most tools offer a brush to “keep” or “remove” areas. I zoom 200% and skim around hairlines, lace, and handles. Two minutes here pays off, especially for dark-on-dark edges where the AI gets shy. For hair, a smaller brush with “refine” or “edge-aware” toggled on usually coaxes back the wispy bits.
If you spot a leftover shadow you actually want (common with shoes), keep it, natural grounding is lovely. If it’s too heavy, I’ll later fade a soft drop shadow on the new background instead of forcing the original.
Download Transparent PNG
Export as a transparent PNG for compositing. Check that the preview checkerboard looks clean, no faint halos. If you’re placing on colored backgrounds or gradients, a transparent PNG is still my safest base. WebP with alpha is great for web, but for editing, PNG remains the friendliest. There… just right.
Fix Common Edge Problems
Hair & Fine Details
Honestly, hair is where we find out who’s serious. If the first pass loses flyaways, try:
- A quick contrast bump on a duplicate (Levels or Curves) to help the edge detector, then re-run the remover. It’s a little hacky, but I’ve rescued curly strands this way more than once.
- Use the tool’s “refine hair” or “smart select” option if available. In my Jan 2026 check, both Adobe Express and remove.bg handled backlit hair decently after one refine pass.
If tiny gaps appear in lace or mesh, nudge the tolerance. Worst case, paint back a hint of those holes with a soft eraser mask on the final composite. Mmm, that feels good.
Shadows & Jagged Lines
Stair-stepping (aliasing) shows up when the upload is small or heavily compressed. Re-export the original photo at higher resolution if you can. If not, add a 0.5–1 px feather to the mask. I also soften edges by 0.3–0.7 px in the refinement panel, just enough to relax the crunch without blurring.
For shadows: I keep gentle, soft-edged contact shadows, they ground the subject. But if the remover chews the shadow weirdly, I’ll delete it and rebuild a clean, soft ellipse later at 8–15% opacity under the product.
Halo & Color Spill
The pale fringe around dark subjects on light backgrounds is usually background color bleeding into semi-transparent edge pixels. Two fixes:
- Decontaminate colors: some tools have this built in (look for “remove color fringe”). It subtly tints the edge toward the subject’s color.
- Contract the mask: shrink by 1–2 px, then feather 0.5 px. On a 2500px image, that tiny pull-in often makes halos vanish.
If you plan to place the cutout on rich colors (e.g., deep teal or warm beige), preview on those tones before downloading. My jaw actually dropped the first time a nearly invisible halo became neon on a navy background.
PNG Export Settings: Avoid Fringing
A clean PNG is mostly about edge pixels and color. Here’s what helps me avoid that faint outline:
- Ensure true transparency: no semi-opaque white layer beneath (sounds obvious, but I’ve done it, twice). Toggle the checkerboard preview to confirm.
- Premultiply smartly: if the tool offers “remove matte” or “no background color,” use it. You don’t want white baked into semi-transparent edges.
- Slight mask contraction: 0.5–1 px shrink, 0.3–0.7 px feather for mid-size images.
- Export at target scale: downscaling after export can create new halos: better to export close to the size you’ll display.
If you’re shipping for web only, WebP with alpha can be smaller while preserving clean edges, but I still do the final edge polish on PNG first, then convert.
PNG vs WebP vs JPG: Quick Comparison
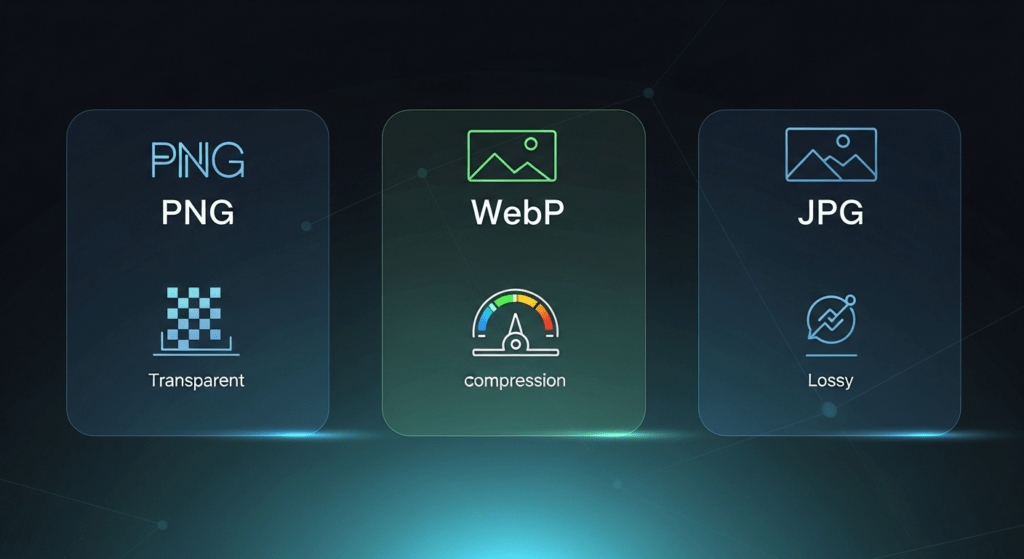
- PNG (with alpha): Best for editing and compositing, keeps transparency perfectly. Larger file sizes, but faithful edges. I use PNG for master assets and marketplace images that need crisp reveals.
- WebP (lossless or lossy with alpha): Great for web, smaller than PNG with transparency support. If your platform supports it (most modern browsers do), it’s a win for page speed.
- JPG (no alpha): Light and fast, but no transparency. Works well once your subject is placed on a final background and flattened. I choose high-quality JPG (80–90%) for social when I’m done compositing.
Practical tip: for storefronts, I keep PNG masters in a tidy folder and export WebP for the live site. For marketplaces that still don’t love WebP, I ship PNG. Camille’s take: Looks good? Ship it.
Quick QA Checklist Before Download
Before I hit “download” on any remove background online job, I do a 30‑second loop:
- Zoom 200% around hair, shoes, hands, and metal edges, any jaggies?
- Toggle the subject over white, black, and a mid-tone color, any halo or color spill?
- Check the base: did a helpful shadow get eaten? Re-add later if needed.
- Export size matches display size, no heavy downscaling later.
- Transparent PNG looks truly transparent, no matte, no stray pixels.
If it can rescue my sleepy brain at 10 p.m., imagine what it’ll do for you. There, done. All right, rest easy now.