Table of Contents

Long time no see~ I’m Camille. There’s a particular kind of frustration that every photographer knows — you nail the composition, the moment is perfect, and then you zoom in on your computer and find the whole thing speckled with grain. Last winter I shot a candlelit dinner scene I was genuinely proud of. High ISO, low light, beautiful chaos. And completely riddled with noise.
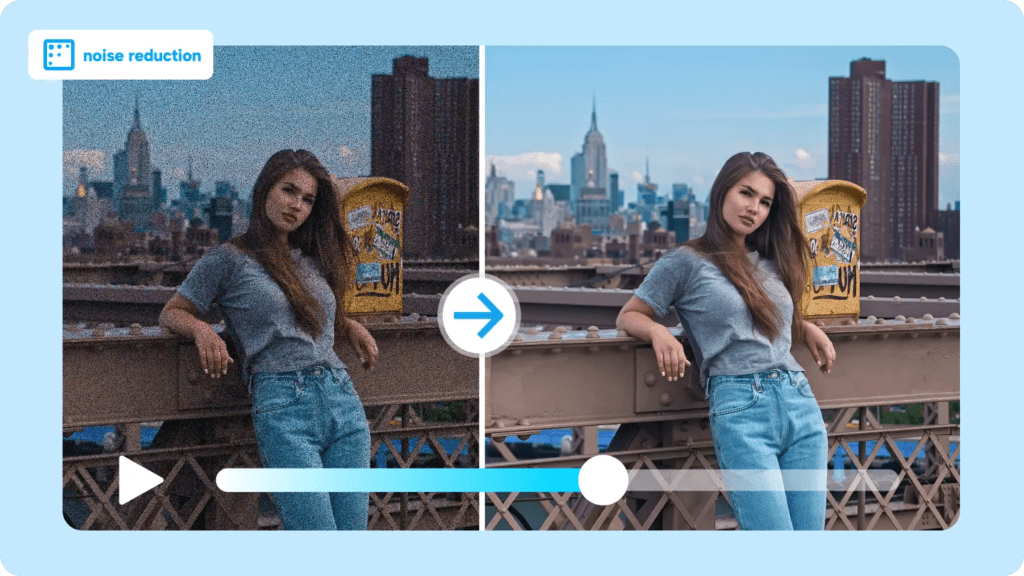
Learning how to remove noise from photos effectively — without accidentally turning your subjects into oil paintings — is one of those skills that quietly transforms your whole editing process. Let me walk you through what’s actually happening, and how to handle it well.

Why Noise Happens (Low Light, ISO, Compression)
Before you can fix noise, it helps to understand where it comes from. And the honest answer is: it comes from asking your camera to do something difficult.
As Wikipedia’s image noise overview explains, digital image noise is caused by random electrical fluctuations in the camera sensor — amplified by heat, sensor size, and how hard the circuitry is working to extract a signal from limited available light. There are two main flavors:
Luminance noise looks like film grain — gray, monochromatic speckles scattered across the image. It’s what most people picture when they think of a “noisy” photo, and it’s most visible in smooth, evenly-toned areas like clear skies or skin.
Color noise (also called chroma noise) looks like random colored pixels — little flecks of green, magenta, or red — especially noticeable in shadow regions. It tends to be more distracting than luminance noise because our eyes are very good at detecting color inconsistencies.
Both types get worse in three common situations: low light (the sensor is hunting for signal), high ISO (the camera amplifies both signal and noise together), and heavy compression (JPEG artifacts add a different, blocky kind of degradation on top of existing noise). Underexposed images are especially prone — when you lift the shadows in editing, you lift the noise right along with them.
Noise vs Detail: The Trade-Off Explained
Here’s the thing nobody tells you clearly enough: noise reduction and detail preservation are fundamentally in tension with each other.
Every denoising algorithm — whether it’s a classic luminance slider or a modern AI model — works by finding patterns that look like “noise” and smoothing them out. The problem is that genuine texture (skin pores, fabric weave, fine hair, brick mortar) can look a lot like noise when viewed at the pixel level. Push the denoise slider too far, and the algorithm starts smoothing away real detail along with the grain.
This is why the goal isn’t zero noise. It’s acceptable noise with preserved detail. A photo with mild, even grain can look beautifully cinematic. The same photo with over-smoothed skin and smeared fabric textures just looks like it was processed too hard.
Keep this trade-off in mind throughout every step below — it’s the frame for every decision you’ll make.
Step-by-Step Denoise Workflow
Upload
Start with the best possible source file. For noise reduction specifically, this matters more than almost anything else:
- RAW files are far superior to JPEGs for denoising. They contain unprocessed sensor data, giving your software much more to work with. AI-powered denoise tools in most professional editors only operate on RAW files for exactly this reason.
- Avoid re-saving JPEGs repeatedly before denoising. Each save cycle adds its own layer of compression artifacts on top of the existing noise — the two types compound each other.
- If you only have a JPEG, that’s fine — just be aware you may see some compression artifacts that look similar to noise, and treat them gently. If you’d like to try cleaning up a noisy image right away, you can experiment with a free AI photo editor that includes built-in denoise and enhancement tools before diving deeper into manual adjustments.
Denoise Pass
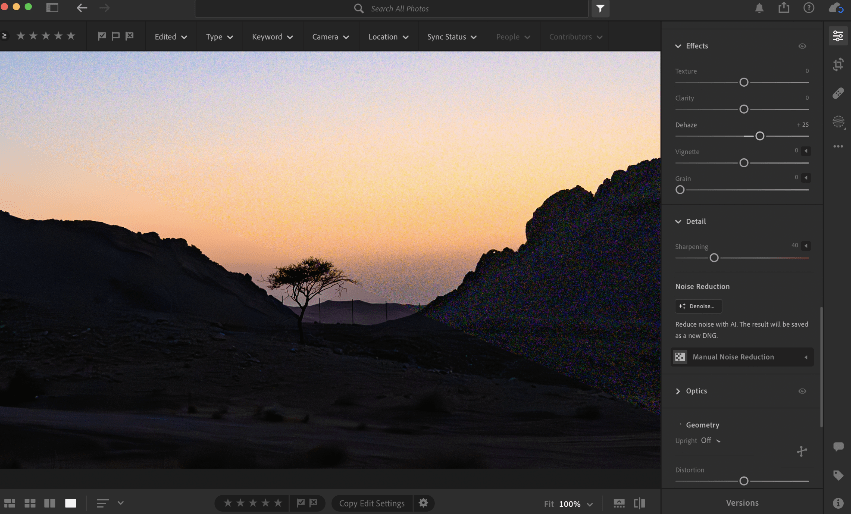
Adobe’s official Lightroom noise reduction guide describes the two main controls clearly: the Luminance slider reduces grainy monochromatic noise, while the Color slider targets those random colored speckles in shadow areas.
A few principles that hold across most tools:
- Address color noise first. Color noise reduction is generally gentler in detail than luminance noise reduction. Cleaning up the color speckles first gives you a cleaner baseline to assess.
- Increase luminance reduction gradually. Start lower than you think you need to. You can always add more; you can’t get back detail you’ve already smoothed away.
- Use the Detail recovery slider (or equivalent) after applying luminance reduction. This specifically works to preserve fine texture that the main slider may have softened.
- AI-powered denoise (available in Lightroom, Photoshop, and several other editors) typically produces significantly better results than manual sliders — it’s better at distinguishing real texture from noise because it’s been trained on millions of image examples.
Check Fine Details (Hair / Text)
This step is the one most people skip, and it’s where the real quality of your denoise pass lives.
Zoom to 100% — actual pixels, not fit-to-screen — and navigate to the most detail-demanding areas of your image:
- Hair and eyelashes: these should still show individual strand separation, not merge into a uniform blob
- Fabric textures: weave, knit patterns, and grain should have visible structure
- Text (if present in the image): letterforms should be sharp and distinct
- Background grain (if intentional): if you want a film-look texture, make sure it’s still there
If any of these look over-smoothed, dial back the luminance reduction and compensate by raising the Detail slider. The goal is to find the setting where grain is tamed but texture is intact.
Avoid Common Denoise Mistakes
Over-smoothing Skin
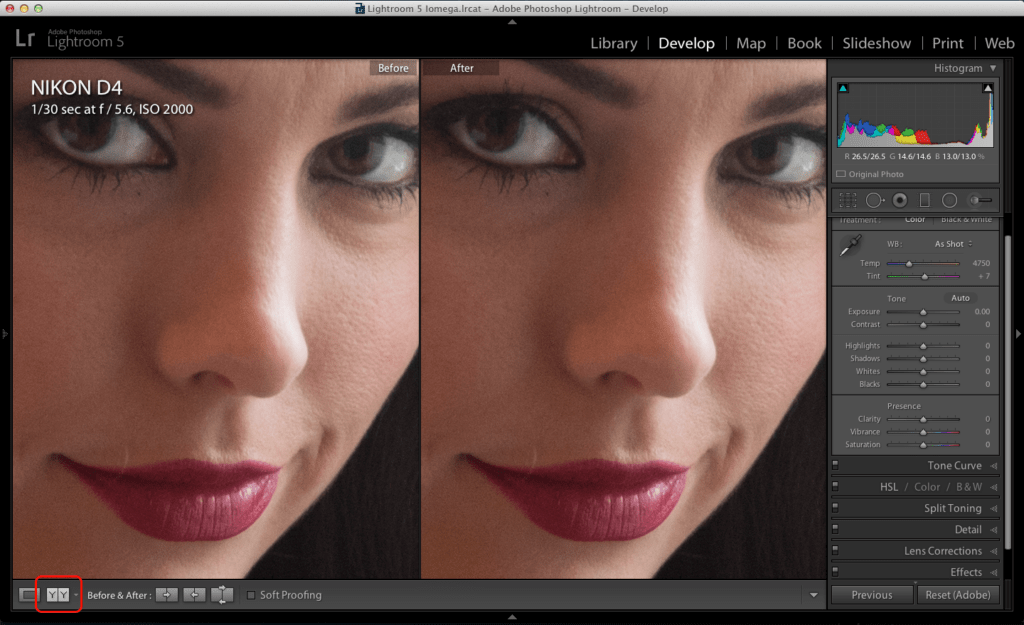
This is the most common outcome of denoising portraits aggressively. Skin tones, particularly in even-toned areas like foreheads and cheeks, get processed into a plastic-looking, poreless surface that reads as immediately artificial — even to people who can’t articulate why.
What to do instead: Apply moderate global luminance reduction, then use a masking brush or local adjustment to apply more aggressive smoothing only to the background or clothing, leaving skin areas at a lower, more natural setting. Most professional editors support this kind of regional adjustment. The result looks intentional rather than processed.
Destroying Textures
Stone walls, wooden floors, denim fabric, weathered metal — these textures are often a significant part of what makes a photograph interesting. Heavy-handed denoising strips them away entirely, leaving surfaces that look strangely uniform and flat.
What to do instead: Use the sharpening mask tool alongside your noise reduction. By applying sharpening only to clearly defined edges (which are genuine detail, not noise), you can compensate for the softening that luminance reduction introduces — preserving texture while still cleaning up the grain.
Export Tips
Once your denoise pass is complete, how you export can either preserve or compromise everything you’ve just done.
According to Adobe’s official JPEG vs TIFF comparison, TIFF files use lossless compression and retain every bit of image data, making them the right choice when you need to archive an edited file or send it for print production without any additional quality loss. JPEG, using lossy compression, is the practical choice for sharing, web delivery, and most everyday output — just export at a quality setting of 85 or higher to avoid introducing new artifacts on top of the ones you just spent time removing.
And when it comes to print specifically, Adobe’s PNG vs TIFF guide makes the distinction clear: TIFF fully supports CMYK color spaces used in professional printing workflows, while PNG — though lossless — is primarily optimized for screen display. For anything going to a print shop, TIFF at 300 DPI is the safest, highest-quality choice. If you’re working with a large number of images from the same shoot, workflows like batch background removal for multiple images can dramatically speed up your post-processing pipeline.
A few practical export rules:
- Web / social use: Export as JPEG (quality 85–92) or WebP
- Print / archival: Export as TIFF at full resolution, 300 DPI
- Transparency needed (product shots on white, logos): Export as PNG
- Never re-export a denoised image as JPEG multiple times — each re-save degrades the file further. Work from your master’s file each time.
FAQ
Should I denoise before or after other edits?
Denoise first, or very early in your editing sequence. Sharpening, contrast adjustments, and shadow lifting all increase the visibility of noise — if you perform those adjustments first and then try to denoise, you’re working with a more difficult starting point. Start clean.
Does shooting in RAW really make that much difference fornoise reduction?
Yes — significantly. As Tamron’s comprehensive ISO and noise guide explains, RAW files preserve the full sensor data before any in-camera processing, giving noise reduction algorithms far more information to work with. JPEG files have already had noise reduction (and compression) applied in-camera, leaving less flexibility for post-processing.
Can I remove noise from a photo that’s already been exported as a JPEG?
Yes, but with reduced effectiveness compared to working from the RAW original. The in-camera JPEG processing has already made decisions about noise, and the compression has introduced its own artifacts. You can still improve the image — particularly for color noise and heavy luminance grain — but don’t expect results as clean as you’d get from the source file. Color noise reduction is often applied more aggressively than it should be — Photography Life’s detailed analysis of color noise reduction shows how Lightroom’s default +25 setting can quietly muddy fine color detail in ways that only become obvious in medium-to-large prints.
How do I handle noise in only part of an image?
Most professional editors support local or masked noise reduction, letting you apply different denoise settings to specific areas. This is especially useful for portraits, where you might want aggressive smoothing on a soft background but delicate handling on skin texture. Draw a mask over the area and adjust independently.
Is grain always bad? Can I keep some intentionally?
Absolutely not always bad. Film grain has a long aesthetic history, and many photographers deliberately add or retain grain for atmosphere — particularly in black-and-white work, street photography, and documentary images. If you want to keep grain, simply pull the luminance slider back to a light-touch setting (5–10) and let the natural texture breathe. The goal is control, not elimination.
What’s the fastest way to denoise a large batch of similar images?
Apply your denoise settings to one representative image from the batch, then sync those settings across the remaining files. In Lightroom, this is done via the Sync Settings panel. For images shot under consistent conditions (same ISO, same scene), the results will be largely consistent — though always worth spot-checking a few frames from the group before exporting.
There — the grainy photo that made you wince can become something worth printing. And you didn’t have to obliterate the detail to get there.
The whole art of removing noise from photos is really about restraint — knowing when to push the slider and, more importantly, when to stop. The images that look the most naturally clean aren’t the ones with the most noise reduction applied. They’re the ones where someone found the edge between grain and texture, and stopped just before crossing it.
Try it on your next difficult shot. You might surprise yourself with how much is still there to save. Until next time — keep it light, keep it lovely.
Previous posts:
Upscale Image to HD: Best Practices for Crisp Results
Fix Blurry Photos: How to Sharpen Without Overprocessing
Photo Enhancer: What It Actually Does (Sharpness, Noise, Upscale)