Table of Contents
Hi, guys, I’m Camille. Somewhere around my fourth AI video project, I had a quiet little crisis.
Shot 1: warm golden interior. Shot 4: same character, inexplicably bathed in cold blue. Shot 6: face slightly different — not wrong, exactly. Just not the same person anymore.
Past me was so serious about prompting perfectly. Present me knows the problem was never the prompts. It was the missing system. No reusable assets. No locked references. Just vibes and optimism.
Here’s the workflow I’ve settled into since. It borrows from traditional pre-production thinking, and it makes Seedance 2.0 feel less like a lottery and more like a collaborator that actually remembers what you both agreed on.
Why Storyboard Thinking Is Trending in AI Video
There’s something quietly happening among the most consistent AI video creators right now. The ones getting clean, coherent sequences aren’t necessarily writing the best prompts — they’re thinking in shots before they touch any tool.
That’s old pre-production discipline applied to a new medium. And it works, because the logic is identical. According to StudioBinder’s storyboard rules guide, continuity breaks in a storyboard can be just as disruptive as continuity breaks in a finished film — screen direction, relative character sizes, positions, and movement can all create confusion between shots if they’re not handled consistently.
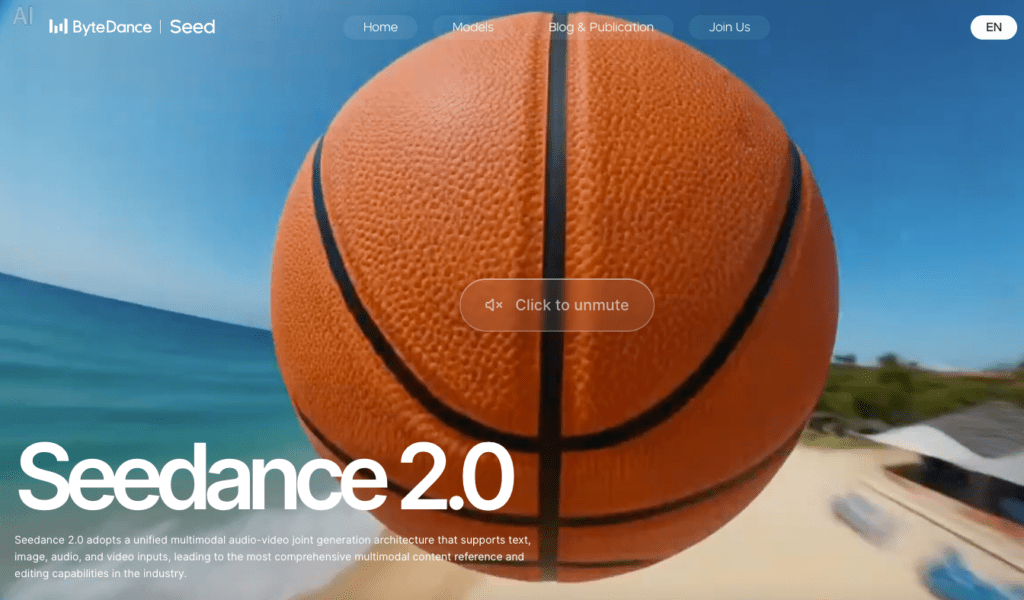
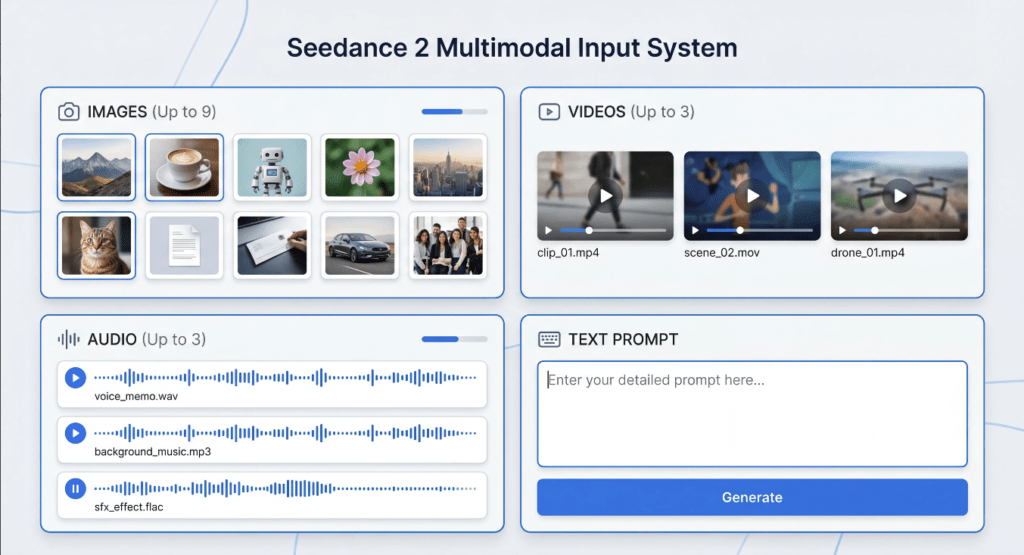
Seedance 2.0’s official feature page describes a unified multimodal architecture that supports text, image, audio, and video inputs simultaneously — giving creators full control over performance, lighting, shadow, and camera movement. That’s a genuinely powerful engine. But the engine still needs a roadmap.
Without a roadmap, each generation lives in its own isolated world, blissfully unaware of every shot around it. Storyboard cutout thinking is how you give it that map.
Build a Reusable Scene Library (Background Plates)
Before generating a single character shot, I build what I call background plates — clean, empty environments locked to the exact angle, time of day, and lighting mood I plan to hold throughout the project.
The concept is simple: instead of describing your background from scratch in every prompt, you reference a pre-approved plate. According to ImagineArt’s Seedance 2.0 feature documentation, the model lets creators combine up to 12 assets in a single project, keeping characters and visuals consistent across all elements from start to finish. Your background plates claim a permanent slot in that reference stack. They become anchors.
For a typical short project, I build 3–5 plates:
- Wide exterior, natural daylight
- Interior warm-light setup (medium-shot-friendly)
- Interior moody and directional (close-up-friendly)
- Neutral studio space (product or fallback shots)
Each plate gets a short label I can tag in prompts: @BGDay, @BGStudio, @BGNight. That naming habit alone has saved me from describing the same room six different ways and landing on six subtly different rooms.
Ahh, that’s nicer. Once the plates exist, background description nearly disappears from my prompts.
Keep Perspective + Lighting Consistent
Here’s the quiet thing that breaks sequences even with a solid plate: camera height mismatch. You can use the same background image and still produce a shot that feels physically wrong if the implied camera position in your character generation doesn’t match.
Before locking a plate, I commit to one camera height for that environment — eye level, low angle, or slightly elevated — and write it down. One line in my notes.
Light direction matters just as much. Specifying “warm key light from screen-left, 3200K” in every prompt is more stable than “golden mood.” The more physically specific the constraint, the less room the model has to drift between shots.
Build a Character Cutout Pack (Angles + Expressions)
With the scene library set, I build the character pack. These are reference stills from multiple angles with multiple expressions — generated and saved before any story shots begin.
For each primary subject, I create:
- Front-facing neutral — the identity anchor
- 3/4 turn left — the conversational default
- 3/4 turn right — reverse angle coverage
- Side profile — movement and walking sequences
- Expression variants — neutral, warm, focused (three covers most commercial content)
The finished pack goes into a simple folder: /characters/[name]/front.jpg, 3q-left.jpg, close-neutral.jpg. When I write prompts, I reference them by label. No recreating from scratch. No squinting at last week’s approved take trying to remember which file name was which.
Feed the model clean, well-labelled reference material and it holds consistency across your whole sequence. Well, that settled nicely.
Shot List → Generation Loop (3-Step Iteration)
With plates and character packs ready, the generation loop becomes almost calm. Here’s the three-step method.
Step 1: Write the full shot list before opening the tool.
Every shot gets a row: shot number, scene environment, character reference tag, background plate tag, camera movement, approximate duration. This is classic pre-production discipline. As StudioBinder’s storyboard guide explains, a storyboard is the director’s first chance to turn words into a story told with images — every shot should be represented so the sequence communicates each story beat clearly. Writing it out forces you to catch continuity problems on paper, where fixing them costs nothing.
Step 2: Generate in small batches and review together.
I run 3–4 shots at a time, place them side by side, and check for visual consistency before continuing. If shot 3 has a lighting drift, I correct the plate reference before generating shots 4 through 8. Catching it early costs one regeneration. Catching it at the end costs ten.
Step 3: Lock and label approved generations immediately.
The moment a shot passes review, rename it with its shot number and mark it APPROVED. Move it to a dedicated folder. This sounds obvious until the second time you accidentally render over something you loved.
One prompt structure worth saving as a reusable template: open with your background plate as the anchoring environment, describe the character action relative to that space, and specify camera movement as a physical behavior (“slow push in, eye level, soft key from screen-left”). Once a version of this phrasing works, reuse it across the project with only the character tag and action swapped.

Common Continuity Breaks & How to Prevent Them
Even with a solid library in place, a few things surface reliably. Here’s what I watch for:
Lighting drift between shots. The most frequent issue. Fix: specify light source direction and color temperature in every prompt — not just the mood. “Soft key from screen-left, warm 3200K” gives the model a stable physical constraint instead of an atmospheric suggestion.
Character scale inconsistency. The subject looks larger in the close-up than spatial logic allows given the wide shot. Fix: note the approximate frame percentage your character should occupy per shot type — wide (around 20%), medium (45%), close-up (70–75%) — and hold to those values throughout the shot list.
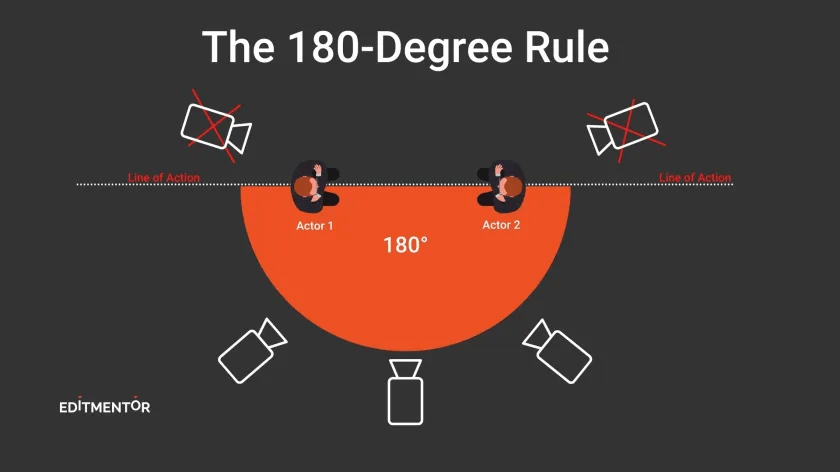
Screen direction reversal. This one is subtle and very easy to miss. As MasterClass explains in their cinematography guide on the 180-degree rule, the camera should stay on one side of an imaginary line between characters so that each character always appears to be facing the same direction, regardless of camera position. In your AI shot list, that means picking a side of the action axis per scene and tagging it in your notes — never letting it vary shot to shot within the same environment.
Background plate mismatch. You used the day plate for shots 1–3, then accidentally tagged the night version on shot 4. Fix: treat plate tags as locked per scene in the shot list. Not something you reconsider at generation time.
Expression inconsistency in dialogue sequences. Tag expressions intentionally from the character pack, and check that emotional registers between subjects feel complementary rather than randomly mismatched. If one character is warm and open, the other blank-neutral will read as odd unless the story calls for it.
The shift I noticed — somewhere around project six with this system — was that I stopped chasing consistency and started directing. The library handled the mechanical continuity. I handled the story.
Build the library once. Use it everywhere. And just like that — the work starts feeling like a good kind of creative.
Until next time, dears.
Previous Posts:
Seedance 2.0 Reference Strategy: Assign Each Asset a Role (Hero, Style, Motion)
Seedance 2.0 Prompt Templates for Consistent Characters (Copy-Paste + Fill-in)
Clean Assets AI Video: Why Seedance 2.0 Results Start Before You Hit Generate