Table of Contents
Hi, guys, I’m Camille. Have you ever spent way too long trying to make a passport photo look “official” and then second-guessed everything from the background white to the head size? Same. This week I redid a friend’s Pakistan passport photo after the first try came out a touch too tight on the forehead, bless my fiddly heart~. Let me walk you through what actually works, based on what I tested again, and the simple checks that keep rejections of your day.
If you’re here for the quick facts: the standard passport photo size in Pakistan is 35 mm x 45 mm on a plain white background. But the details, resolution, head ratio, print layout, are what turn “close enough” into “approved on the first try.” Here’s my calm, creator-friendly guide to getting it right without fuss.
Size Requirements (mm/in + resolution)
Let’s anchor the basics so everything else clicks into place.
• Physical size: 35 mm (width) x 45 mm (height). In inches, that’s approximately 1.38 in x 1.77 in.
• Orientation: Portrait.
• Background: Plain white (more on lighting and tones below).
• Print quality: Crisp, no ink streaks or banding.
Resolution, printing, and pixels
• For printing: 300 dpi is the practical, photo-lab-friendly baseline. At 300 dpi, 35×45 mm works out to roughly 413 x 531 pixels.
• For extra-crisp prints or certain e-submissions: 600 dpi files are often preferred by photo studios and some offices, which have pixel dimensions of about 827 x 1063.
What I’ve seen in practice
• My 300 dpi prints have passed in-person submissions at embassy counters and local photo centers. When uploading to online forms, I’ve had better luck with 600 dpi JPEGs (file sizes under 1–2 MB). There we go~
Caution and source-check
• Requirements occasionally vary by office. If you’re applying online or via a specific mission, peek at the latest official guidance from Pakistan’s Directorate General of Immigration & Passports before you finalize. I also keep the ICAO photo guidance handy for biometrics-aligned framing.
• If a site specifies both size in mm and pixels, prioritize the physical size and make sure your print or export dpi matches their pixel guidance.
Background & Lighting
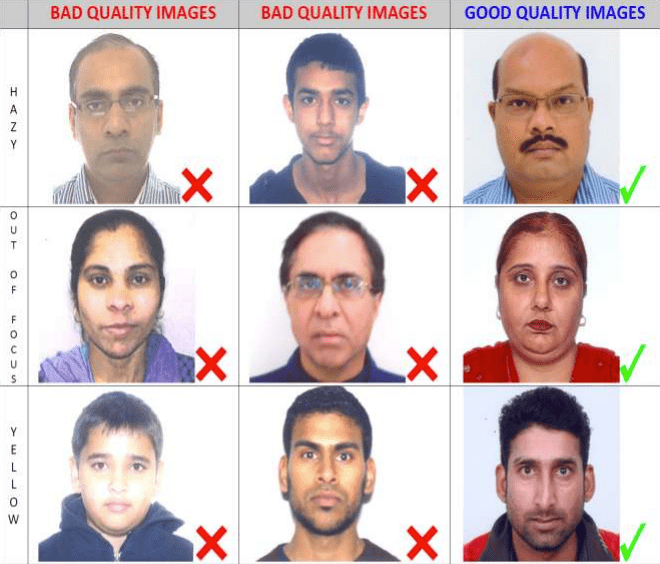
White backgrounds sound simple until they turn gray-blue under kitchen lights. Here’s what consistently looks clean and “official,” without a studio.
• Background color: Plain white. Not cream, not gray. If you don’t have a white wall, hang a smooth white sheet or poster board. Avoid textures and shadows.
• Lighting: Soft, even light from the front. A bright window with thin curtains is lovely: overhead-only light tends to cast eye and neck shadows.
• Shadow control: Step 0.5–1 meter away from the background, so your silhouette doesn’t stamp a dark halo. If you see cheek shadows, bring a second light (or a phone flashlight bounced off-white paper) from the opposite side.
• Skin tone and color cast: Mixed bulbs can push green or orange. If your photo looks too warm or cool, nudge white balance gently until the wall reads neutral white again. Ahh, that’s nicer.
• No heavy edits: Keep it honest, no skin smoothing, no reshaping, no color filters. Clean, true-to-life is the goal.
Wardrobe and details
• Clothing: Contrast against white. Mid-tone or dark tops work well: avoid white collars that blend into the background.
• Glasses: If allowed, watch for glare, tilt the frames slightly downward to cut reflections. No tinted lenses.
• Headwear: Religious headwear is typically allowed: keep the face fully visible from chin to forehead and edges of the face.
• Expression: Neutral, mouth closed, eyes open and looking straight at the camera. Think “calm passport energy,” not “holiday selfie.”
Head/Face Ratio (Quick Visual Rules)
This is the part that quietly decides approval. I used to fuss forever… silly. Now I do these quick checks and it sails through.
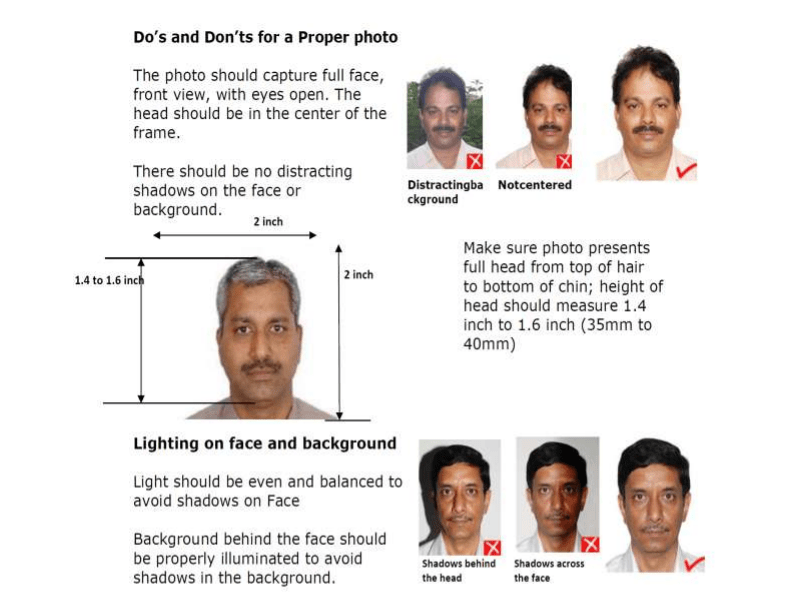
Target framing (aligned with ICAO-style guidance many offices follow):
• Head height (chin to crown): roughly 70–80% of the photo height. On a 45 mm-tall image, that’s about 31–36 mm of head height.
• Top margin: Leave a calm sliver of space above the crown, typically 3–5 mm.
• Horizontal placement: Eyes on a level line, centered left–right.
Quick visual checklist
• If the forehead kisses the top edge, it’s too tight, zoom out a touch.
• If the shoulders dominate the frame, zoom in, your face should feel present.
• Eyes sit about 2/3 up from the bottom of the frame. If they’re drifting too high, lower the crop a bit.
I tested five variations last month: the ones with 75% head height and a neat top margin printed best and felt unmistakably “passport official.” I may have giggled when the spacing lined up on the first try.
Printable Sheet Setup
Sometimes you just want a tidy 4×6 . You can hand it to the photo desk and be done. Here’s how I set up sheets that cut cleanly and keep scale accurate.
4×6 Print Layout
• Canvas: 4 x 6 inches at 300 dpi (most labs default to this). That’s 1200 x 1800 pixels.
• Slots: You can fit six photos at 35×45 mm (about 1.38 x 1.77 in each). I usually arrange two columns by three rows.
• Scale check: Before placing, create a rectangle exactly 35 x 45 mm (or 1.38 x 1.77 in) and drop each cropped portrait inside, no resizing after placement. “One and done, no back-and-forth nonsense.”
• Orientation: Keep all photos upright to avoid confusion at the counter.
Margin and Spacing Tips
• Outer margins: Leave 6–8 mm around the edges, so the lab’s auto-crop doesn’t nibble your sizes.
• Between photos: 3–4 mm gutters help with scissor cuts. Mark faint guides if you’re printing at home.
• Border safety: Many kiosks slightly zoom to “fill.” Disabled borderless auto-zoom or add a thin white border, so the inner photos remain exact.
• Test once: Print a draft and measure one photo. If it’s off by a millimeter, adjust your canvas or the kiosk’s “fit” setting, and you’re golden. Well, that settled nicely.
Quick Maker Workflow
When I’m moving fast, client forms, last-minute renewals, this is the quiet, reliable rhythm I use. It’s tool-agnostic: use any maker that supports passport presets and simple background controls.
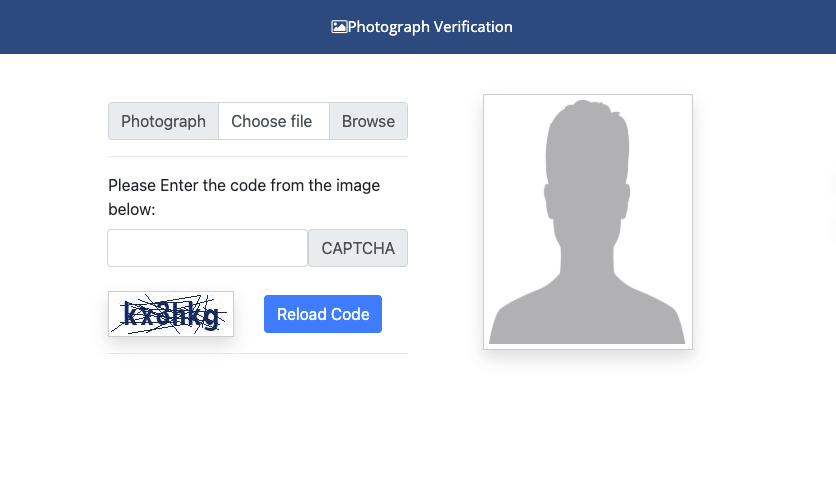
Upload
• Start with a sharp, evenly lit photo taken at eye level. No ultra-wide lenses, 50 mm equivalent on a phone’s main camera works fine.
• Shoot against a white wall if possible: it makes cleanup nearly instant.
• I like to capture a little wider than needed, so I can crop precisely to 35×45 mm later. Ooh, look at that.
Auto Crop + Background
• Choose the “Pakistan passport” or “35 x 45 mm” preset if your tool offers it. If not, set the exact size manually and enable a face-aligned crop.
• Use auto background cleanup to pure white (RGB roughly 255/255/255). If the tool overshoots and eats hair edges, dial back the strength and feather by 1–2 PX.
• Check head ratio: aim for 70–80% head height with 3–5 mm above the crown. Nudge the crop rather than scaling the face.
• Color and exposure: Nudge exposure until the background reads white without blowing out skin highlights. If your shirt is white, deepen blacks slightly, so it doesn’t melt into the background. “There…is just right.”
Download/Print
• Export two versions: a 300 dpi print-ready JPEG and a 600 dpi file if an online portal requests higher detail. Keep file sizes moderate (often under 1–2 MB for uploads).
• For lab prints, place multiple copies on a 4×6 layout (see above) and save as sRGB JPEG, kiosks love it.
• Measure after printing. If a lab machine trims a hair off the top, adjust your margins once and save that layout as your new default. Easy now~
Time saved: My latest run took 6 minutes from upload to ready-to-print sheet, down from my old 20-minute tinker fest. Past me was so serious.
FAQ
Q: What is the official passport photo size in Pakistan?
A: 35 mm x 45 mm, portrait orientation, on a plain white background. For prints, 300 dpi is standard: for digital submissions, many accept higher-resolution files (often equivalent to ~600 dpi). Always confirm with the latest instructions from the relevant office or the official DGIP guidance.
Q: What pixel size should I export?
A: For printing at 300 dpi, around 413 x 531 pixels matches 35 x 45 mm. Some portals or studios request 600 dpi (about 827 x 1063 pixels) for crisper detail. If a website specifies both mm and pixel dimensions, follow their pixel guidance exactly.
Q: Does the background have to be pure white?
A: Yes, plain white. Slight off-white can trigger rejections. If your wall leans gray, use an AI background cleaner to set a true white. Keep edges natural, no halos.
Q: How big should my face be in the photo?
A: Aim for 70–80% of the photo height, from chin to crown, with a small top margin (about 3–5 mm). If your forehead touches the edge, zoom out.
Q: Can I wear glasses or head coverings?
A: Glasses are usually allowed if there’s no glare or tint. Religious headwear is typically permitted: keep the full face visible. Avoid shadows on the face.
Q: Matte or glossy prints?
A: Either is generally fine as long as the print is crisp and free of reflections or banding. Matte is kinder to fingerprints: glossy can look a touch sharper.
Q: Will phone photos be accepted?
A: Yes, if they’re well lit, sharp, and framed correctly. Use the main camera (not ultra-wide), stand back a little, and crop precisely to 35 x 45 mm.
Q: My print looks slightly smaller/larger than 35×45 mm, now what?
A: Labs sometimes auto-fit. Reprint with “no scaling,” add 6–8 mm outer margins on the 4×6, or disable borderless enlargement. Measure after the second print.
Q: Where can I double-check the latest requirements?
A: Start with the Pakistan DGIP photo guidelines for current instructions, and keep the ICAO reference for framing norms. Requirements can shift over time: if something in your local office differs from the general guidance above, follow the office’s instructions.
A gentle closing thought: Beautiful, compliant photos don’t have to feel heavy. Set the size, keep the light soft, mind the headroom, and you’re done. There… feels gentle there, doesn’t it? Until next time, dears~
Previous Posts:
Passport Photo Size India (2026): Requirements + Quick Maker Steps
Passport Photo Size Bangladesh (2026): Size, Background, Common Mistakes
Background Remover for IDs: When It’s Allowed and When It’s Not