Table of Contents
Hello, I’m Camille. Yesterday I was staring at a photo of a glass perfume bottle and thinking, “Why do you look so clean in real life… and so messy on my screen? ” If you’ve ever tried to remove background from transparent objects, glass, plastic bottles, glossy jars, frosted packaging, you know the feeling.
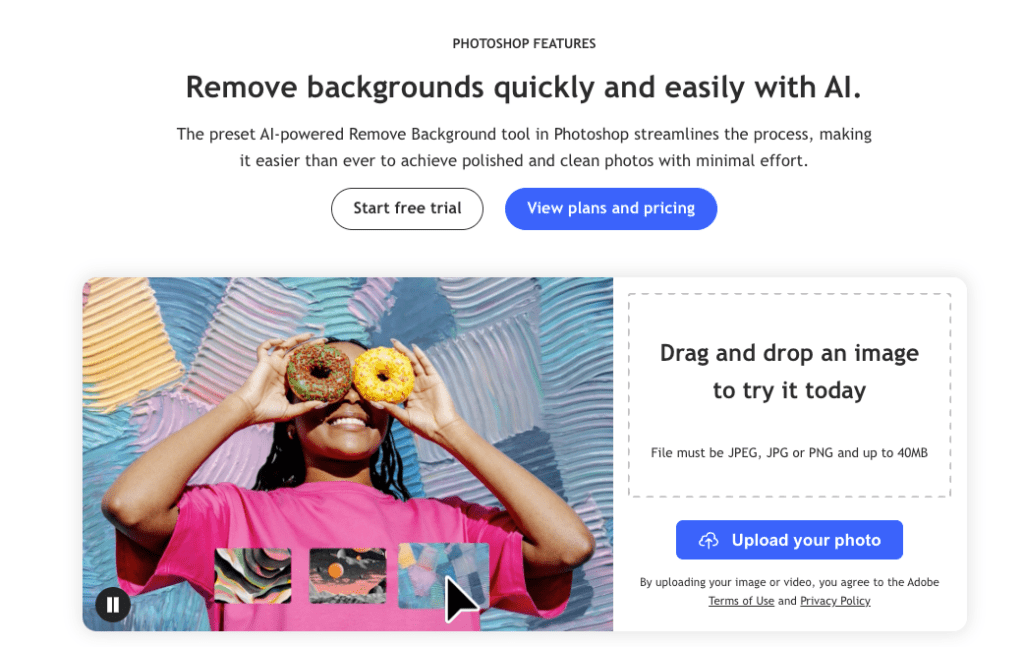
Over the last year (most recently testing again withPhotoshop, Photopea, and a few AI background removers like Clipdrop and remove.bg), I’ve been quietly refining a workflow that keeps the glow and clarity of transparent products without spending an hour painting masks by hand. Let me walk you through how I shoot, cut out, and clean up transparent objects so they look polished, natural, and ready for e‑commerce or social, no drama, no plastic-y halos.
Why Transparent Objects Are Hard
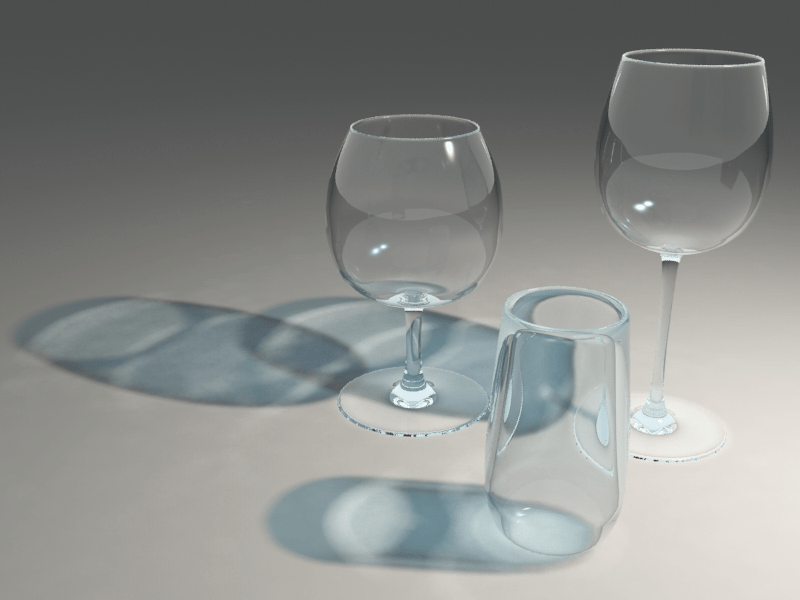
Transparent objects are sneaky. They don’t just sit on top of a background, they borrow it.
When you remove background from transparent objects, you’re not only separating object from backdrop: you’re also trying to keep the light, color, and reflections that pass through them. If the original background was messy, the glass has literally recorded that mess.
Best Photography Setup
Before we talk pixels, we have to talk light. Every time I rush the shooting setup, I pay for it in Photoshop later.
You don’t need a full studio, but a simple, thoughtful setup will cut your editing time in half and make every auto remover look smarter than it actually is.
Use Backlight and Diffusion
For transparent objects, backlight is your quiet best friend.
What I aim for most days:
- A soft light source behind the object (window light or a softbox)
- Diffusion between the light and the object (sheer curtain, tracing paper, diffusion panel)
- A simple surface in front (acrylic, white card, or a light wood board)
Why this helps when you remove background from transparent objects:
- Backlighting makes the edges glow slightly instead of disappearing. Auto tools can read that contrast much better.
- Diffusion softens harsh hotspots, so you don’t get pure white blowouts where the software has nothing to work with.
- You get beautiful internal reflections that still look good once the background is gone.
Avoid Busy Backgrounds
Transparent objects are little background sponges. If the scene behind them is busy, it will show up in the glass.
To keep things simple:
- Use plain backdrops: white, light gray, or a very soft gradient.
- Keep distance between object and background so any shadows are gentle, not sharp.
- Avoid high-contrast patterns, no grids, brick walls, or colorful props nearby.
The calmer your background, the easier it is later to:
- Let AI tools detect what’s object vs. backdrop.
- Keep refractions looking natural, not like random shapes.
Step-by-Step Cutout Workflow
This is the workflow I’ve settled into after a year of back-and-forth experiments across Photoshop, browser-based tools, and API integrations. I’ll describe the logic so you can adapt it to whichever tool you’re using.
On average, for a well-shot image, this whole flow takes me about 5–8 minutes per transparent product, start to export.
Auto Removal
I almost always start with an auto background remover, either built into my editor (Photoshop’s Remove Background, Photopea’s AI select) or a dedicated tool.
Here’s my usual order of operations:
- Run the auto remove on the original high-res image.
- Zoom to 200–300% around the glass edges and handles.
- Check these spots carefully:
- Inside mug or bottle rims
- Thin stems or handles
- Clear caps or dropper tips
Most modern tools are surprisingly good, often 80–90% there on a clean shot. The goal is not perfection: it’s to get a usable base mask you can gently refine.
Preserve Reflections / Edges
This is where transparent objects usually win or lose their realism.
What I don’t do anymore:
- I don’t force all transparent areas to pure white.
- I don’t fully erase every shadow.
Those tiny refractions and soft shadows are what make things feel like real glass, not a 3D render that escaped.
Instead, I:
- Feather the mask slightly (0.5–1 px) so edges don’t look cut with scissors.
- Use a low-opacity, soft brush (10–30%) on the mask to gently:
- Fade hard halos where the remover got confused.
- Restore thin details (like etched logos or rim highlights) if they got clipped.
- Keep a little contact shadow under the base, either from the original or re-painted, so the object isn’t floating weirdly.
Export Transparent PNG
When you remove background from transparent objects, your export format really matters.
I almost always:
- Export as PNG with transparency (PNG-24)
- Keep the original resolution for marketplaces like Amazon, Etsy, Shopify
- Save a web-optimized version (compressed PNG or WebP with alpha) for social or landing pages
Reasons:
- JPEG doesn’t support transparency, so you’re stuck baking in a background.
- PNG retains soft, semi-transparent edges beautifully.
- If you’re compositing on multiple backgrounds, a clean transparent PNG saves you from re-editing later.
If you’re generating assets via API, just make sure the service supports RGBA output and that you’re not accidentally flattening onto white before download.
There… just right.
Fix Common Failures
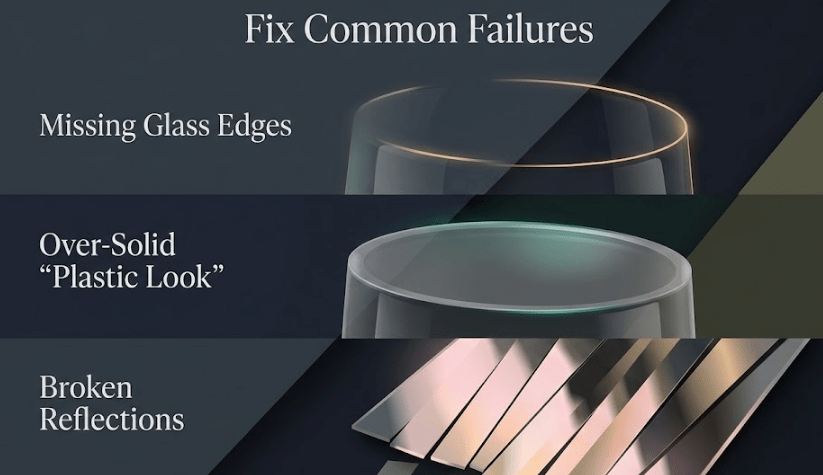
Even with a good setup and solid tools, transparent objects still love their little dramas. Let’s walk through the three failures I fix most often and how I calm them down.
Missing Glass Edges
You zoom in and, uh oh, the rim of the glass or bottle has half vanished. This usually happens when the edge is very bright against a bright background.
What I do:
- Duplicate the original layer under the cutout.
- On the top (cutout) layer, paint black on the mask to reveal missing rim details from the original.
- If needed, lightly brighten that underlying layer with a curve clipped to just the edge zones, so it blends with the new background.
If I’m working in a simpler app without layers, I’ll:
- Re-run the background remover with “keep edge detail” or “less aggressive” settings if available.
- Or manually trace only the rim with a soft selection and lighten it, then re-run the tool.
It’s a tiny thing, but once the rim comes back, the object suddenly looks solid and trustworthy again. Wait… that’s actually lovely.
Over-Solid “Plastic Look”
This one bothers me the most. The glass comes out, but it looks like thick, cheap plastic. That usually means too much contrast and not enough subtle translucency.
To soften this:
- Lower contrast slightly on the object using a curve or levels.
- Bring back a hint of inner shadow or refraction from the original shot by blending in small areas.
- On the mask, use a soft, low-opacity brush at the edges to add a faint gradient, so it feels like light is passing through.
Sometimes I’ll even:
- Add a very subtle reflection or gradient in the background behind the glass on the final layout. Not a fake mirror, just a whisper of tone so the transparency has something to interact with.
Past me was so serious about razor-sharp cutouts. Now I’ve learned that a tiny bit of softness feels more expensive.
Broken Reflections
Reflections can get “broken” when the remover cuts too cleanly through a highlight or a shadow, leaving hard chunks that don’t match the new background.
Common signs:
- A bright stripe across a bottle that suddenly stops.
- Reflections that look like they belong to a completely different room.
Here’s how I fix them:
- Blur the reflection slightly (1–2 px Gaussian blur) so it feels less tied to the old scene.
- Tone it down with a soft brush on a dodge/burn or curve layer, just to lower its intensity.
- If it’s really strange, I’ll paint a simple, cleaner reflection: a soft vertical white gradient down one side of the bottle, low opacity, masked to the shape.
The goal isn’t physical accuracy: it’s visual calm. If your viewer isn’t thinking about the reflection at all, you’ve done enough.
QA Checklist for Product Listings
Before I upload anything to a store or send files to a client, I run through a quick little QA ritual. It’s not formal, just a steady way to catch the weirdness before customers do.
Here’s what I quietly ask myself when I remove background from transparent objects for listings:

- Do the edges feel natural at 100% zoom?
- No jagged pixels, no glowing halos, no sudden opacity jumps.
- Does the object still feel transparent, not flat?
- You can sense thickness in the glass/plastic.
- There are small, believable internal highlights and shadows.
- Is the base grounded?
- A faint shadow or reflection so it’s not floating.
- Alignment feels straight, no accidental leaning.
- Does it sit nicely on both light and dark backgrounds?
- If you can, test on #FFFFFF and a mid-gray.
- Check that semi-transparent areas don’t look dirty on darker tones.
- Is the color and clarity consistent across a set?
- Series of bottles should match in brightness and contrast.
- No one image looks like it came from a different photoshoot.
This whole check takes 1–2 minutes per image, and it’s saved me from a lot of “why does this bottle look haunted on mobile?” moments.
If it passes the calm test, edges soft, details clear, nothing yelling for attention, I call it done.
💡Camille’s take: Looks good? Ship it. Beautiful design doesn’t have to feel heavy.
Try it on your next glass or glossy item, just one photo, one careful cutout. You might surprise yourself. There… feels gentle, doesn’t it?
Previous Posts:
How to Remove Background from a Photo — Hair, Glass & Tricky Edges Done Right
Remove Background from Product Photos for Amazon, Etsy & Shopify (Standards + Workflow)
How to Batch Remove Backgrounds from Images (100+ Photos in Minutes)