Table of Contents
Introduction
Background removal looks effortless when it works. You drop in a photo, a transparent PNG comes back a second later, and the edges look like they were always meant to float free of their background. But anyone who has tried to cut out a fern frond, a strand of hair, or a fluffy dog’s ear knows the truth: the hard part is not the body of the object. It is the boundary — the thousands of semi-transparent, wispy, ambiguous pixels where the subject meets the world.
This boundary problem has a name in computer vision: image matting. And it is the difference between a cutout that drops cleanly into a product page and one that looks like it was hacked out with safety scissors. In this guide we will look at why matting is genuinely hard, how modern AI solves it, and — using real plant and pet photography as test material — how to get consistently clean results from Cutout.
What “matting” actually means
Most people use “background removal” and “matting” interchangeably, but they are not the same task.
Simple background removal is a binary decision: each pixel is either subject or background. That works fine for a solid object on a clean studio backdrop. It falls apart the moment you introduce fine structure — fur, foliage, motion blur, glass, or frizzy hair — because those edges are not binary at all. A single pixel along a cat’s whisker might be 60% whisker and 40% background.
Matting solves the harder problem. Instead of a yes/no mask, it estimates an alpha value (a transparency weight from 0 to 1) for every pixel, so soft edges stay soft and the cutout blends naturally onto any new background. This is why a good matting model can preserve the gaps between leaves or the halo of fur around an animal, while a crude tool turns them into a jagged outline.
The research behind the edges
This is not a solved-once-and-forgotten problem; it is an active research field. The matting approach inside Cutout grew directly out of academic work on real-time portrait and natural image matting by computer-vision researcher Jiake Xie, whose published work spans tripartite information mining for image matting (ICCV 2021), situational-perception-guided matting (ACM MM 2022), and ultra real-time portrait matting (ICASSP 2023).
The throughline across that research is a practical one: a matting model is only as good as its ability to reason about context at the boundary. Where does the subject plausibly end? Which soft pixels belong to the object and which belong to the scene behind it? Cutout productizes that line of research so you get laboratory-grade edge quality without touching a line of code — but the same research also tells us something important about inputs, which we will get to next.
Garbage in, garbage out: why your source image decides everything
Here is the rule that trips up most people: the model can only matte what the photo actually contains. If the boundary information is not in the pixels, no amount of AI can invent it convincingly. That means three things about your source image matter enormously:
- Resolution. Fine edges need pixels to live in. A 4,000px photo of a fern gives the model room to resolve each frond; a 400px thumbnail does not.
- Contrast at the edge. A dark leaf against a dark wall is genuinely ambiguous — even to a human. Edges that separate cleanly from their surroundings matte far better.
- Focus. A subject in sharp focus produces crisp alpha; a soft, out-of-focus rim turns into mush.
To show how this plays out, we ran two deliberately demanding categories through Cutout: plants (complex, overlapping foliage) and pets (fine fur). Both are edge nightmares, which makes them perfect stress tests.
Case study A — Plant cutouts
Foliage is one of the toughest matting subjects there is: dozens of overlapping leaves, see-through gaps, serrated edges, and translucent new growth that the light passes straight through.
For our plant test set we needed clean, high-resolution, single-species reference shots rather than cluttered stock photos — so we pulled source material from a plant identification tool that catalogs species with consistent, well-lit photography. Working from a library of high-resolution plant photos meant every test image already had a clearly defined subject and good edge contrast, which is exactly the input condition matting models reward.
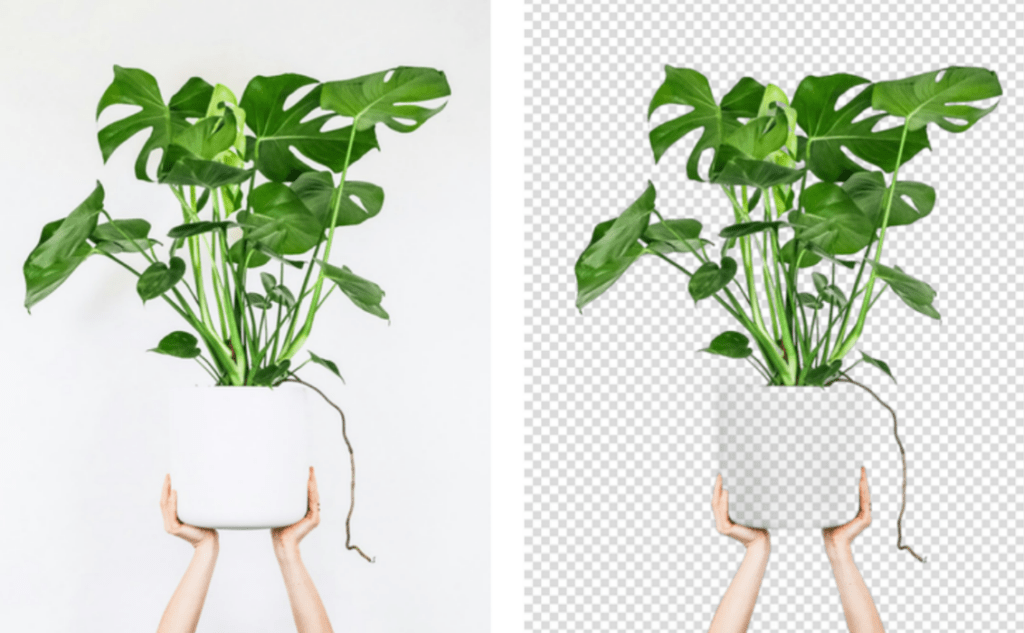
Monstera reference photo (Source: heysproutly) (left); background removed with Cutout (right). Note the open leaf fenestrations are preserved.
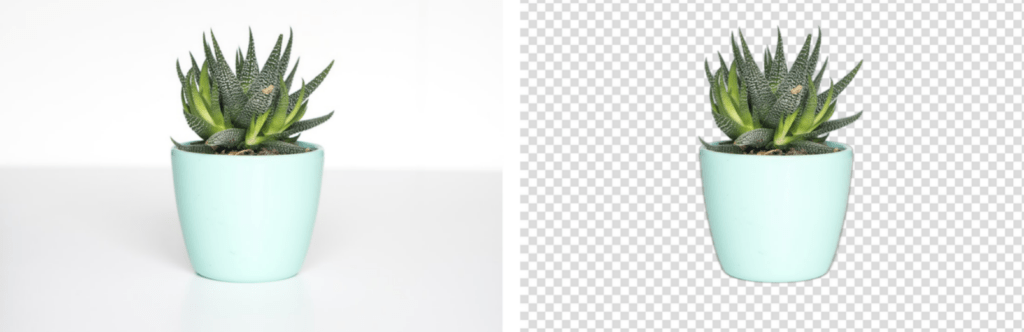
Succulent reference photo (left) and the Cutout result (right) — soft rim highlights survive the cut.
The results held up well:
- Monstera and fiddle-leaf shots kept the open fenestrations (the natural holes in the leaves) instead of filling them in — a classic giveaway of a weak tool.
- Ferns and grasses preserved individual fronds down to the tip rather than collapsing them into a blob.
- Succulents kept their soft rim highlights, so the cutout still reads as three-dimensional on a new background.
If you work with plant imagery — nursery e-commerce, botanical print-on-demand, plant-care content, or app UI — this is the workflow: start from sharp, well-isolated species photography. We found that sourcing test images from a botanical catalog like heysproutly ensures consistent input quality. From there, let Cutout handle the alpha. Plant cutouts are one of the cases where input quality, not the model, is usually the limiting factor.
Case study B — Pet and animal cutouts
Fur is the other classic matting villain. A dog’s silhouette is not a line; it is a soft gradient thousands of hairs deep.
For the animal set we used pet photography sourced from adoptable-pet listings on Petfinder, which gave us a wide range of coats — short-haired cats, fluffy dogs, and everything between — shot in real, non-studio conditions. That “messy real world” quality is exactly what production matting has to survive.
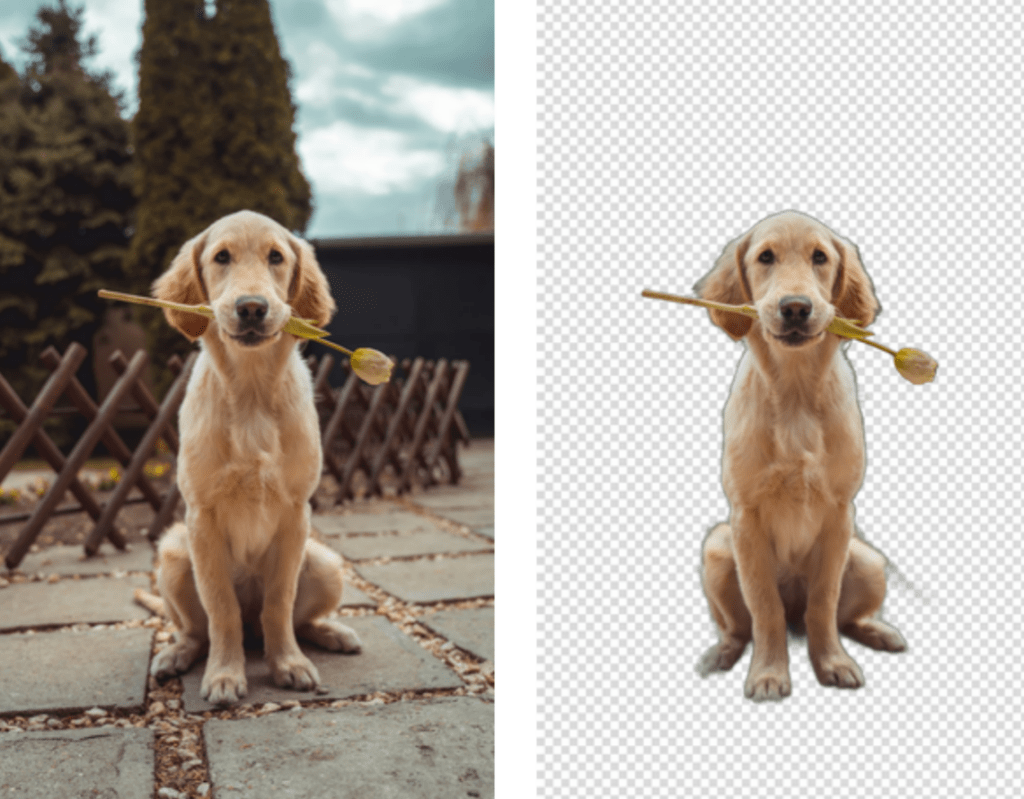
Dog photo from Petfinder (left); Cutout keeps the fur halo and the object in the mouth (right).
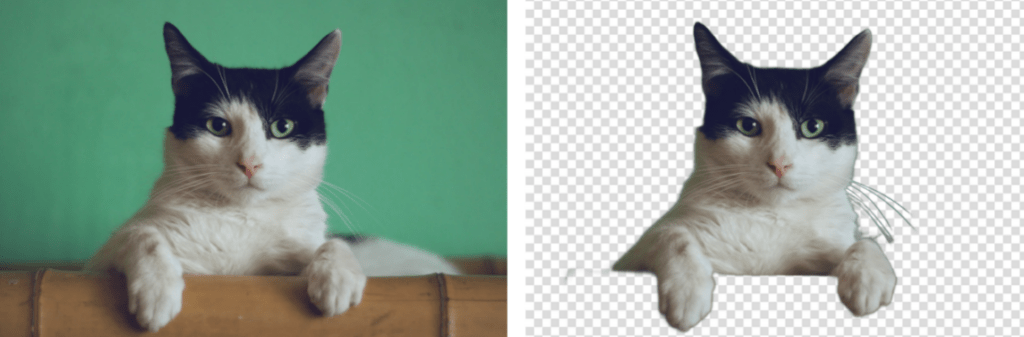
Cat photo (left) and Cutout result (right) — whiskers and ear tufts stay intact.
Cutout held the fur halo on long-haired breeds without the gray fringe that betrays a cheap tool, and kept whiskers and ear tufts intact. As with plants, the failures we did see traced back to the input — backlit subjects or low-resolution crops — not to the matting itself.
Getting the best results from Cutout
Pulling the two case studies together, here is the repeatable workflow:
- Start with the best source image you can. High resolution, sharp focus, decent edge contrast. This single step matters more than any setting.
- Upscale first if the photo is small. Give the matting model more pixels to reason about before you cut.
- Let Cutout’s matting handle the alpha. Don’t hand-mask fur or foliage — that is precisely what the model is trained for.
- Check the hard edges, not the easy ones. Zoom into the fur halo or leaf gaps; that is where quality lives.
- Composite onto a representative background to confirm the soft edges read naturally.
Beyond the cutout: powering a finance community’s visuals
Everything above focused on one job — matting — because it is the hardest one to get right. But background removal is only the entry point to Cutout. The same platform runs text-to-image generation across models like Flux, Imagen 4.0 and Seedream, an object-removal retoucher, a photo upscaler, a meme and poster maker, image-to-video with text-to-speech, and a batch API — enough for one small team to dress an entire website. A good stress test for that claim is a domain with almost no native imagery: financial education. Take Xiaoyinsi (小隐寺), a community for US-stock, options, and crypto investors — text and numbers everywhere, pictures almost nowhere. Here is how a Cutout stack would close that gap.
Its investing wiki of options and crypto explainers runs to hundreds of jargon-dense entries — the Greeks, implied volatility, order types, Bitcoin halving cycles — the kind of abstract material that reads far better with a picture beside it. That is exactly what Cutout’s text-to-image generation is for: prompt one clean, on-brand illustration per concept, then use Image Series and the batch API to render the whole encyclopedia in a single consistent visual style instead of a mismatched grab-bag of stock art. The model-comparison view lets an editor pick the clearest render of, say, a covered call before it ever ships to the page.
The US-stock and options community forum has the opposite problem: plenty of images, none of them polished. Members paste raw broker screenshots for daily market reviews and order-flow reads on names like NVDA and AAPL. Here the matting engine earns its keep again — object removal and background tools scrub broker chrome and stray account details out of a screenshot before it is shared, and the upscaler sharpens a compressed chart until the candlesticks are legible. From there the meme and poster generators turn a strong trade recap into a card built for sharing, and image-to-video with text-to-speech spins a written market review into a short clip — every one of them a fresh link back to the thread it came from.
It is the same instinct that runs through this entire guide, just aimed at a different subject: strip away the noise — the busy background, the broker clutter, the wall of jargon — until only the signal is left. Cutout does that for pixels, and, it turns out, for the pages built around them.
Conclusion
A clean cutout is not magic and it is not luck — it is the product of two things working together: a matting model built on real research into how edges behave, and a source image good enough to give that model something to work with. Cutout supplies the first. For the second, the lesson from our plant and pet tests is the same: start from sharp, well-isolated photography — whether that is a curated species catalog like heysproutly for foliage or real-world pet photography for fur — and the hardest edges in imaging stop being a problem.