Table of Contents
Last weekend, I opened an ID shot I took last week and sighed at the grayish wall behind me. You know the one: slightly blotchy, a tiny shadow that refuses to behave. Enter the humble ID photo background remover. Used gently, it’s a quiet helper, not a makeover artist, that turns a decent capture into a clean, compliant ID photo.
I’m Camille. I’ve been testing background removal and compliance tweaks on and off for a long time, timing each step and noting what gets rejected and why. The goal: keep things fast, accurate, and natural. Below is the exact approach I use for passport, visa, and license photos, what standards tend to look for, what edits are okay, and a simple workflow that keeps you out of the “over-edited” danger zone.
Typical ID Photo Standards (Common Patterns)
Most ID systems want the same quiet virtues: neutral background, true skin tone, and a face that biometric checks can read easily. Every country has quirks, but the patterns repeat.
Here are the common threads I see across official references:
- Background: plain, uniform, and light, often white or off‑white: some regions accept light gray or light blue. No gradients, no texture.
- Lighting: even, soft, no hard shadows. Think cloudy‑day window light.
- Head size and framing: face centered, eyes at the correct vertical position, head within a specific percentage of the frame.
- Expression: neutral, mouth closed, eyes open, no tilts.
- Accessories: no tinted glasses: regular clear lenses are often allowed if there’s zero glare. No hats unless for religious/medical reasons (and then, the face must be fully visible).
If you want to double‑check specifics (recommended):
- U.S. Passport Photos: see the U.S. Department of State photo requirements.
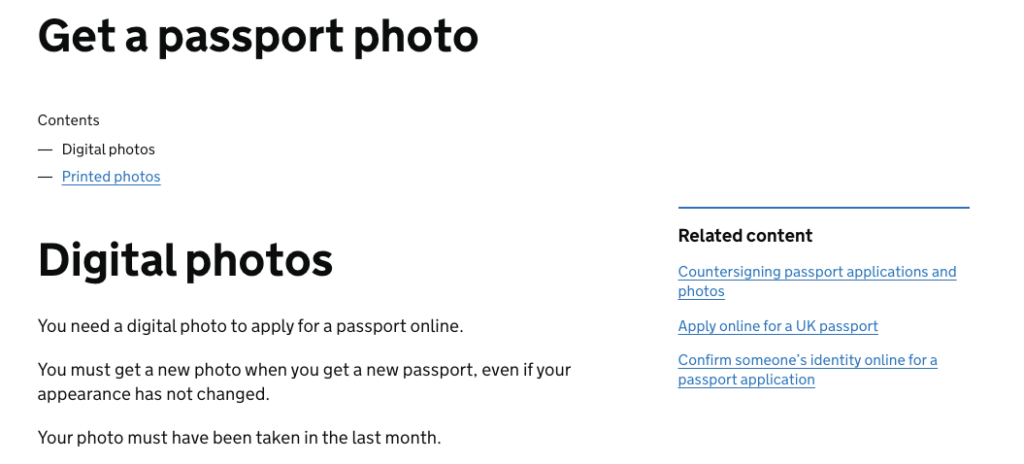
- U.K. Passport Photos: the official GOV.UK guidance is clear and frequently updated.
Practical note from my tests: when I kept the background uniform and the skin tone untouched, automated checks passed more consistently. The id photo background remover helped, but only when I treated it as a broom, not a paintbrush. “Ahh, that’s nicer.”
Edits Usually Allowed vs Not Allowed
A gentle reminder: nothing here overrides your local authority’s rules. When in doubt, follow the official page for the document you need. That said, this is the line I see most agencies draw.
Allowed: Background Cleanup, Cropping
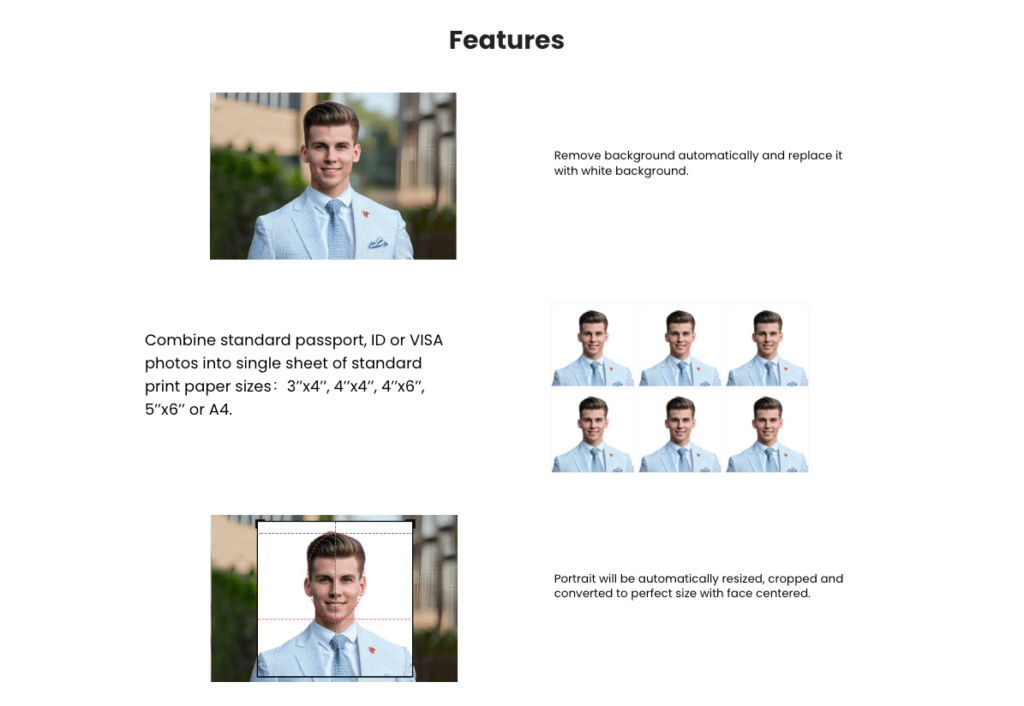
A modest id photo background remover is generally fine if it only makes the background uniformly acceptable, no halos, no cutout edges around hair, no color spill onto the face. Cropping to official dimensions is expected, and mild exposure correction is typically okay if it keeps things realistic.
What I do in practice:
- Clean, uniform background in an approved color.
- Subtle exposure and white balance nudge to match real‑life tone.
- Crop to exact pixel dimensions/print size and DPI required by the authority.
In quick timings: using an automated remover plus a soft manual brush took me 2–3 minutes per photo on average (tested January 2026), versus 12–15 minutes when I used to mask by hand. Bless my fiddly heart~
Not Allowed: Face Shape Alteration, Heavy Filters
If the edit changes biometric features, that’s a no. No slimming jaws, no reshaping noses, no smoothing that erases skin texture into porcelain. Avoid makeup filters, eye‑brightening, and color grading that shifts skin undertones.
Hard nos I keep in mind:
- Don’t retouch moles, scars, or freckles that alter identity.
- Don’t whiten teeth or eyes.
- Don’t sharpen or blur to the point of artifacts.
- Don’t add or remove shadows that change face contours.
My rule of thumb: if the adjustment would make a friend say, “Oh wow, you look different,” it’s probably not compliant. If they say, “Looks like you, but better lit,” you’re in the safe lane.
Safe Workflow for ID Background
Here’s the calm, repeatable flow I use whenever an id photo background remover enters the chat. It’s built to be fast but still natural.
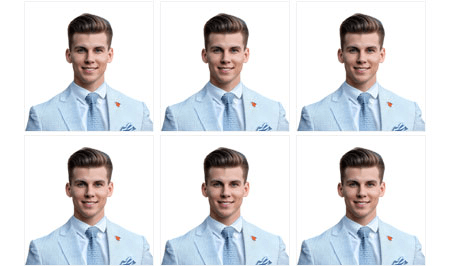
Our Cutout.Pro to handle the ID photo background step cleanly and gently—no heavy retouching, just a uniform, acceptable backdrop. I think it’s worth a try for you.
Use Correct Background Color
- Start with the authority’s accepted colors. White or off‑white is common: light gray or light blue appears in some visa and license specs.
- If your remover lets you pick a hex, aim for a subtle off‑white to avoid harsh edges: something like #F7F7F7 often photographs as “white” without blowing highlights.
- Watch the hair edges. Flyaways should look like hair, not crispy cutouts. I zoom to 200% and spot‑check around curls and wisps.
Keep Lighting Natural
- If the original shot is flat but clean, leave it. Don’t add fake rim lights or gradients.
- Gentle global exposure fixes are safer than local dodge/burn for ID photos.
- If shadows appear after background replacement (common with aggressive edge detection), reduce edge contrast and feather slightly. I aim for an edge softness of 1–2 px at print size.
I once spent 20 minutes nudging a shadow by hand… never again. With a good remover and a 1–2 px feather, it took me under a minute. There… just right.
Maintain True Skin Tone
- Lock your white balance to something neutral before background edits. Then let it be.
- Avoid “portrait enhancement” toggles. If you must, cap it at the lowest setting and compare to the original.
- Check on multiple screens. On my warm‑tuned laptop, a skin tone looked perfect: on a calibrated display, it leaned pink. I now do a quick A/B on both. Well, that settled nicely.
If you’re automating (hello, dev friends): keep the pipeline simple, background matting, neutral fill, minimal color transform. Log the transforms for traceability. If an authority questions an image, you’ll have a tidy audit trail.
Common Rejection Reasons (and How to Avoid)
From my notes, rejections usually come from things we can spot before exporting. Here’s where I slow down for 60 seconds and save a week of delays.
Shadows / Uneven Lighting
- Hard shadow on background or neck? Re‑shoot with the subject 0.5–1 m from the wall and use diffuse light (window + sheer curtain works). If re‑shooting isn’t an option, reduce contrast carefully: don’t obliterate the shadow until it looks fake.
- Shine on forehead or glasses glare? Powder or tilt the light slightly. For glasses, a tiny chin drop reduces glare more than you’d think. Hehe, nice when it works.
Wrong Head Size / Position
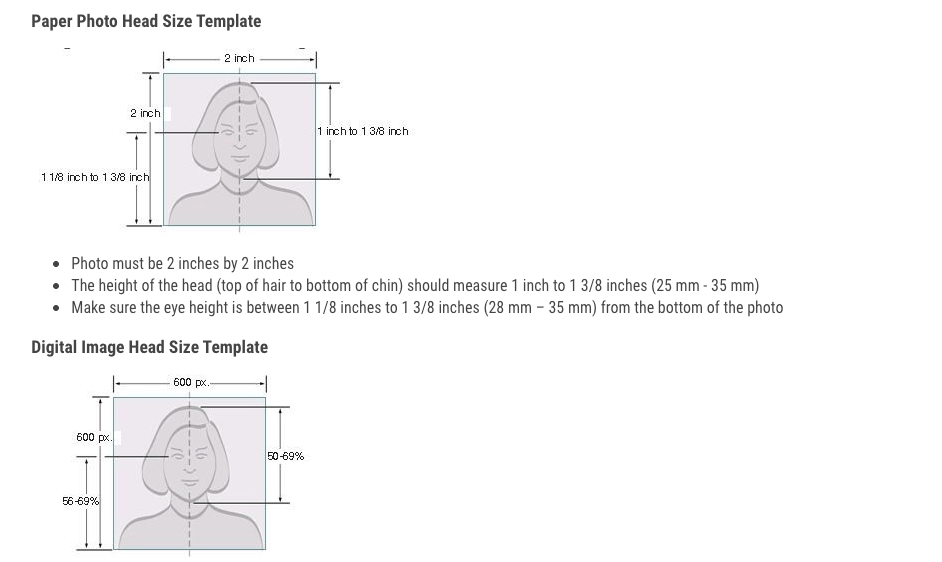
- Most specs want the head to occupy a defined percentage of the frame and the eyes on a specific horizontal line.
- Use overlays/grids from official templates when available. The U.S. provides a photo composition template and the U.K. both provide clear diagrams in their guides.
- If your remover tool includes smart cropping, still verify with a template, automation is helpful, but it’s not your art director.
Over-smoothing
- Skin should still look like skin. If texture disappears, the image can fail automated checks.
- Zoom to 100% and 200%. If the cheeks look plastic at 200%, dial it back.
- Compare with the untouched original side‑by‑side. If your eyes relax, you’re back in the safe zone. If they don’t, undo.
Final Compliance Checklist
A quick pass before you hit submit or print. I keep this on a sticky note.
- Background: uniform and allowed color (white/off‑white or as specified): no gradients, patterns, or halos.
- Lighting: even, no hard shadows: no added effects: natural contrast.
- Skin tone: true to life: no heavy smoothing or makeup filters.
- Head and eyes: within required size/position: face centered, expression neutral.
- Accessories: no tinted lenses: minimal glare: head coverings only if permitted and not obscuring the face.
- Image quality: sharp but not oversharpened: no JPEG blocks: correct resolution and file size.
- Cropping & format: exact pixel/print dimensions: correct file type: correct background color values.
- Audit trail (optional but helpful): note what you changed, “background uniformized to off‑white, minor exposure +0.2 EV, crop to 600×600 px.”
If it can rescue my sleepy brain at 10 p.m., imagine what it’ll do for you. One and done, no back‑and‑forth nonsense. And just like that… you’re ready to submit.
Quick note on limits: rules do change. Always confirm against the latest official page, especially for passports and visas. If something’s unclear, I’d rather say “I don’t know, let’s check the authority’s site” than guess.
Beautiful design doesn’t have to feel heavy. Keep it simple, keep it honest, and let the id photo background remover do exactly one job: tidy the backdrop so your real face stays, well, yours.
Previous posts:
Remove Background from Logo: Keep Sharp Edges & True Colors
Transparent Background PNG: How to Export Cleanly (No Artifacts)
Remove Background from Signature: Create a Clean Transparent Stamp