Table of Contents
Hey, guys. This morning I looked at a product shot on my Pixel and whispered, “Not today, fuzzy edges.” If you’ve ever tried to remove a background on Android and ended up with crunchy cutouts or halos, you’re in good company. I’m Camille. I make social covers, product images, and little video snippets daily, and I need clean results, fast. So I’ve been testing a handful of Android apps and simple workflows that quietly get the job done without turning my afternoon into a tap-fest.
Below is how I remove backgrounds on Android, what actually improves the cutout quality before you even touch a tool, and quick fixes for those tiny gotchas (hello, flyaway hair).
Android Photo Tips for Better Cutouts

Before you even tap “remove background,” give the cutout a fighting chance. A few small choices at capture make a surprising difference.
- Pick contrast on purpose: If your product is light, put it in front of a medium or darker background: dark subject, lighter background. Plain wall, poster board, or a fabric drape works. I keep a matte gray foam board handy because it flatters both white and black items.
- Gentle, even light: Window light is your friend. Avoid harsh top light that throws jagged shadows around edges. If I’m shooting at night, I prop a cheap LED panel behind parchment paper for a softer wash.
- Step back, shoot wider: Give the app pixels to work with. I shoot a bit wider and crop later, more edge detail means fewer weird bites missing from hair and hands.
- Turn off Portrait blur for product shots: Portrait mode’s fake blur confuses some auto cutouts. For people photos, sure: for products, I leave it off so the edges stay crisp.
- Watch glossy reflections: Highly reflective packaging blends into backgrounds. A tiny angle change or polarizing clip-on filter can save you minutes of cleanup.
- Clean outlines: If you can, untangle earrings, move hair off shoulders, and straighten straps. Old me would fix it in post. Present me nudges it once and smiles.
Why this matters: background removers rely on clear separation between subject and background. The more your edges pop, the fewer edits you’ll need after the auto cutout. It’s not about perfect shoots, just little improvements that save you six taps later.
Step-by-Step: Upload → Remove → Export

Here’s my simple flow on Android. I rotate tools based on the image and where it’s going, but the bones are the same: good input → one-tap cutout → clean export.
Pick High-Resolution Input
I start with the original photo from the camera roll, no messaging-compressed copies. If I shot in 12 MP, I keep it. In my tests, higher-res inputs consistently gave smoother hair and fabric edges with Canva (v2x on Android), PhotoRoom (v4x), and Adobe Express (v10x). If a client sends me a low-res image, I’ll re-capture if possible: if not, I accept that tiny “stair steps” may show and plan a softer background to hide them.
Two tiny setup tweaks that help:
- Ensure your camera saves in JPEG or HEIC at full size (Settings → Image quality). Avoid “Storage saver” if you can.
- If you edited in Google Photos, export/save a copy at original resolution before removing the background.
Auto Cutout
- Canva (Android app): Add your photo to a design → Effects → Background Remover. Quick, tidy, and the preview is forgiving on hair. I like it for social posts because I’m already in a canvas.
- PhotoRoom (Android app): Open app → Upload → Remove Background is instant. It’s snappy for e‑commerce and comes with ready-made shadow presets.
- Adobe Express (Android app): Media → Remove background. Strong on tricky edges when the subject color is close to the backdrop.
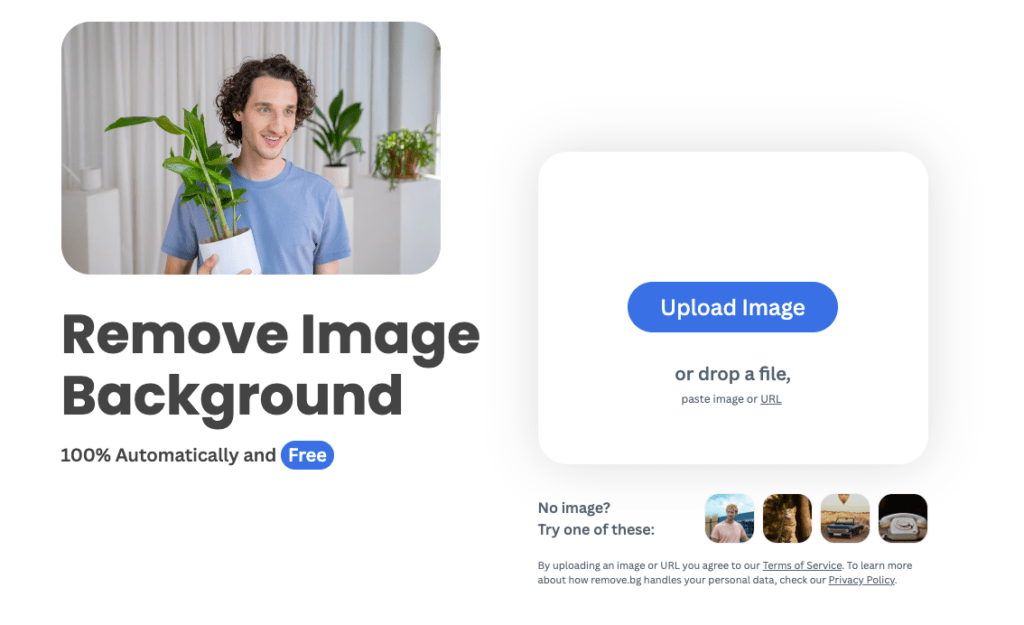
- remove.bg (mobile web or API): The mobile site is great for quick cuts when I don’t want a full editor. For batch or automated flows, the remove.bg API is reliable, and dev teams I work with have plugged it into order flows.
Real-world note: On my Pixel 7, average “tap to clean cut” times were 2–6 seconds per image in PhotoRoom and Canva, 4–8 seconds in Adobe Express, and about 2–4 seconds via remove.bg mobile. Compared to my old manual lasso habits (bless my fiddly heart~), that’s minutes saved per image.
Light touchups (only if needed):
- Erase/restore brush: Paint back small missing bits (earrings, laces) or erase stray blobs. I try 10–20 px brush with 80–100% hardness for crisp edges.
- Soft shadow: A subtle drop or floor shadow grounds the subject. PhotoRoom’s “Classic” shadow on 10–20% opacity is a safe start. Canva’s Shadows → Glow with blur 20–30 also works.
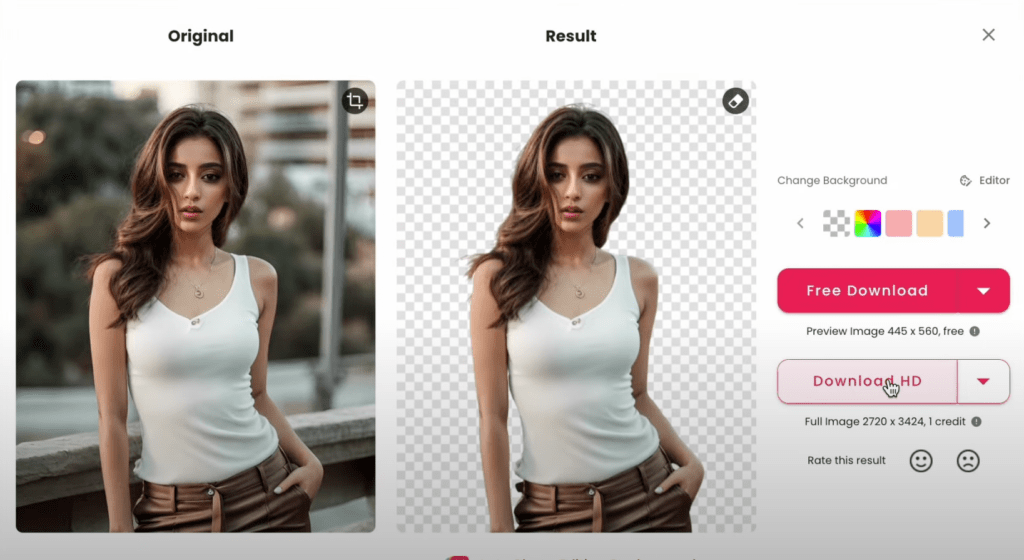
When one-tap removers get you close but not quite clean — fuzzy hair, tiny gaps, or a stubborn halo — our Cutout.Pro fits right into this gap. No heavy editing, no app-hopping — just clean cutouts you can export as transparent PNGs and move on.
Export PNG (Transparent)
When I need the subject floating cleanly, I export PNG with transparency. That keeps the edges crisp and lets me drop the subject onto brand colors or textured backdrops later.
- For social: If the app offers size presets, I export at the final canvas size (e.g., 1080×1350 for IG portrait posts) to avoid extra recompression later.
- For stores: I keep 2000–3000 px on the long edge so platforms like Shopify or Etsy can downscale cleanly. sRGB color profile, PNG, and under ~5 MB if possible.
- For automation: When we run bulk cutouts via API, we store master PNGs and generate JPEG derivatives on demand for speed. “There… just right.”
Troubleshooting
Tiny quirks happen. Here’s how I nudge them back into place.
Jagged Edges
What it looks like: Stair-step teeth on hair, fabric, or diagonal lines.
Fixes I actually use:
- Upscale first: If you’re stuck with a small image, a light 1.5–2× upscale in an app that preserves detail can smooth edges before the cutout. Then remove the background. It’s not magic, but it helps.
- Softer background afterwards: Place the cutout on a slightly textured or softly colored background. Jaggedness hides better against gentle noise than pure white.
- Feather or refine: In Canva/PhotoRoom, use a tiny edge feather (1–2) or increase smoothing. In Adobe Express, the “Refine edge” brush along problematic hair strands works well.
Missing Details
What it looks like: Earrings disappear, fingers blend into light backgrounds, shoelaces get snacked.
Fixes:
- Restore brush pass: Zoom to 300–400% and paint back those bits with the restore brush. I do this first, it’s usually faster than any fancy trick.
- Boost contrast locally: Back in Google Photos, a small “Pop” or “Sharpen” on the original, save, then re-run the remover. Edges separate better.
- Re-shoot a quick fill: If it’s for a hero image and you can, shoot one more frame with increased subject-background contrast (even scooting 6 inches can matter). Past me would refuse. Present me shrugs, reshoots, and saves ten minutes.
Halo Effect
What it looks like: A faint light outline around the subject, most obvious on dark backgrounds.
Fixes:
- Edge cleanup: Use erase with a small hard brush to trim the halo. Slow but precise.
- Color-matched rim: Add a thin inner shadow or color overlay that matches the new background. 5–10% opacity is enough to melt the edge.
- Shadow layer: A subtle drop shadow with low blur tucked close to the subject disguises halos without looking fake. “Oh, that’s lovely.”
If none of these land, I’ll sometimes run the image through a second app. Funny enough, the algorithms fail in different places, what one misses, another saves. Hehe, nice when it works.
Best Export Settings by Platform
When you remove the background on Android, export settings matter as much as the cutout. Here’s what I actually ship, based on platform constraints and official docs where available.
E‑commerce product listings
- Shopify: PNG with transparency for clean, flexible placement. Long edge 2000–3000 px, sRGB, under ~5 MB. For details, Shopify’s image guide is here: Shopify image best practices.
- Amazon: For main images, pure white background is required (no transparency in the final upload). I export high-quality JPEG, 2000+ px on the longest side, sRGB. Requirements evolve: check Amazon’s product image requirements.
- Etsy: Listings look good around 2000–3000 px wide. If I need background flexibility, I keep a master PNG, then export a JPEG on light gray or white.
Social and content
- Instagram Posts: 1080×1350 (portrait) or 1080×1080 (square). Export PNG if you need crisp overlays: JPEG is fine for photos. Keep sRGB.
- Stories/Reels covers: 1080×1920. If your subject will overlap UI elements, leave headroom at the top. I keep a transparent PNG master so I can recolor backgrounds quickly.
- TikTok video cover: 1080×1920 JPEG/PNG. I align the subject dead-center with a small ground shadow for depth, subtle but it pops.
- YouTube Thumbnails: 1280×720 minimum, under 2 MB, JPEG or PNG, 16:9 aspect per YouTube’s spec. If I used a transparent PNG originally, I composite onto a bold color background before export.
Developers and teams (hello, quiet automators)
- Store a master: Keep a transparent PNG master at 2–3k px. Generate resized JPEG/WEBP variants server-side.
- Color profile: Force sRGB on export to avoid surprises across devices.
- Automation hooks: If you batch-remove backgrounds, the remove.bg API is straightforward. In one client’s flow, swapping manual Photoshop cutouts for the API removed three steps and saved ~4–6 minutes per product. Well, that settled nicely.

Personal guardrails I stick to
- Keep a layered file (if the app supports it) alongside the transparent PNG. Future-you will want it.
- Name files clearly: product-color-angle-###.png. It sounds fussy until it saves your launch day nerves.
- Test a post: I always upload one image to the platform and view it on my phone before batching the rest.
Old habits, still learning.
There you have it—my no-drama Android background removal playbook. Now it’s your turn to play.
What’s the most cursed cutout you’ve ever survived? Drop your horror story (or triumphant glow-up) in the comments—I need the laughs, and I promise to reply with my own disasters.
Previous posts:
Remove Background on iPhone: Fast Steps + Export Guide
Background Remover for IDs: When It’s Allowed and When It’s Not
Remove Background from Signature: Create a Clean Transparent Stamp