
Hey, Camille here. Last Thursday, I was finishing a product shoot for a small skincare brand — fifteen images, all taken in a kitchen with questionable lighting and a very visible coffee maker in the corner. Deadline: the next morning. The client didn’t want pure white backgrounds (too sterile for their vibe), but they definitely didn’t want my kettle in the frame either.
That in-between space — keep the mood, lose the mess — is exactly what background blur is for. If you’re an e-commerce seller shooting at home, a freelance designer juggling lifestyle imagery, or someone running social media and tired of every post looking like a catalog page, this one’s for you. I’ll walk through when blur beats full removal, what a good blur actually looks like, and the exact flow I used that night to finish before midnight.
Blur background vs remove background — which should you use?
Quick answer first, because I know some of you just want the decision: blur when context matters, remove when the subject needs to stand alone.
When blurring keeps better context than full removal
A cut-out product floating on pure white tells the viewer “this is a product for sale.” A softly blurred version of the same product on a wooden counter tells them “this is a product you’d actually use in your kitchen.” Both are valid — they just speak different languages.
Blur preserves depth, atmosphere, and that small storytelling layer that makes an image feel lived-in rather than staged. It’s also way more forgiving of messy shooting conditions, which is the part nobody talks about.
Best use cases: headshots, product lifestyle shots, social media
A few scenarios where I reach for blur over removal:
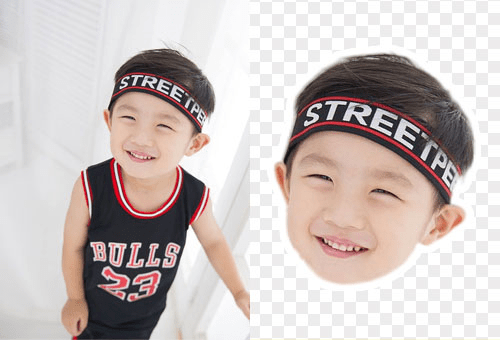
- Portrait headshots for LinkedIn or team pages. Full cutouts on white can feel like ID photos. Blur keeps the image human — there’s still a suggestion of a room, a window, a life behind the person.
- Lifestyle product shots. You want the setting suggested, not screamed. A blurred kitchen counter hints “this belongs somewhere”; a removed kitchen counter says “this is for sale.”
- Instagram and TikTok covers. Social platforms reward atmosphere. Blur gives that shallow depth-of-field look without needing an 85mm lens.
- Before/after content. The “real environment” stays visible, which makes the transformation feel honest rather than staged.
What makes a good blur effect
Here’s where things get interesting. Most people assume blur is just “make background fuzzy,” but there are two very different kinds — and your brain notices the difference even if your eyes don’t.
Natural depth-of-field vs artificial blur
Real depth-of-field, the kind a camera produces with a wide aperture, isn’t uniform. Objects close to the subject blur slightly; objects far away blur a lot. Light points become soft circles (photographers call this bokeh). Nikon’s introduction to depth of field breaks down how aperture and distance shape this falloff — worth a skim if you’ve only ever shot on a phone.
Artificial blur, applied poorly, is flat. Everything behind the subject gets the same mushy treatment, which is why over-blurred phone portraits sometimes look like a sticker pasted onto wallpaper. The fix isn’t more blur — it’s better edge handling and a more restrained blur radius. I learned this the hard way on an early batch of lifestyle shots where I cranked the blur to maximum thinking “more cinematic.” Looking back, older Camille would feel sorry for herself.
How AI separates subject from background
Modern AI tools use segmentation models to detect the subject’s outline, then apply blur only to the pixels outside that mask. The quality depends almost entirely on how cleanly the edges are detected — which is why hair, transparent objects, and busy backgrounds are still the hardest cases.
If it doesn’t look obviously AI-made, that’s exactly the point. Good segmentation should be invisible.
Step-by-step: blur background with Cutout.Pro
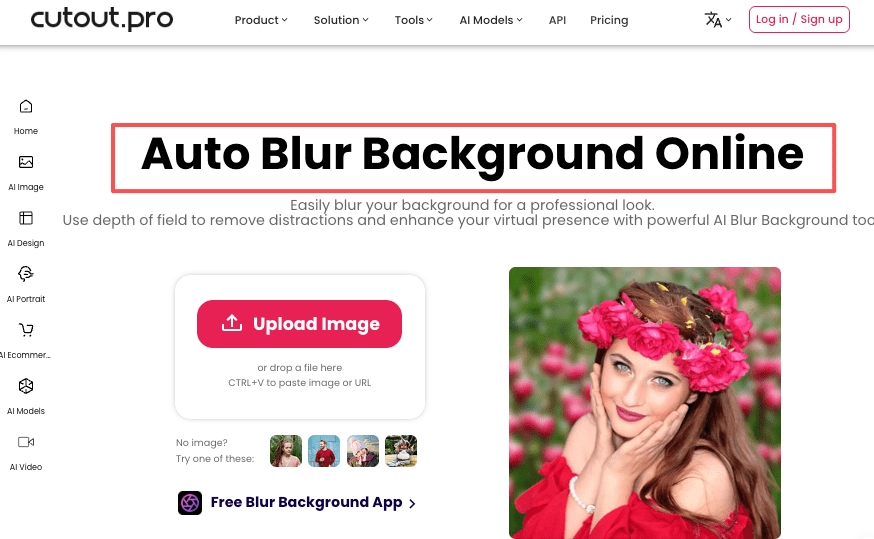
Here’s the exact flow I used for that skincare shoot. Three steps, no scrubbing around with brush tools.
Upload → auto subject detection → set blur radius
Open the blur background tool and drop in your image. Subject detection runs automatically — usually in a second or two. Then you choose the blur radius. My rule of thumb: start lower than you think you need. A slight blur feels cinematic; a heavy one starts to look like a Zoom background from 2020.
For portraits, I tend to land around 15–25% intensity. For product lifestyle shots, 10–20% keeps enough environmental context. Adjust by eye, not by formula — the number that looks right on a phone screen often feels too strong on a desktop preview, so I check both before committing.
Adjusting edge feathering for natural transitions
This is the step most people skip, and it’s where fake-looking blur comes from. Feathering softens the border between subject and blurred area, so the transition doesn’t look like a paper cutout. Even a small feather value makes hair edges and shoulder lines blend properly. If you’re shooting people with curly or textured hair, check this zoomed-in before exporting — messy edges show up cruelly at 100%. I usually toggle between a white and dark preview to catch any stray halo that survived the mask. Mm, that feels much better once it’s clean.
Export settings
JPEG at 90–95% quality is fine for social and most e-commerce uses. PNG only if you need it for compositing into another layout later. One pass. No back-and-forth grinding, and the result lands somewhere between “polished studio” and “real environment” — which is usually exactly where lifestyle imagery wants to live.
When background removal is the better choice
Sometimes blur isn’t the right answer, and being honest about that matters more than defending a workflow.
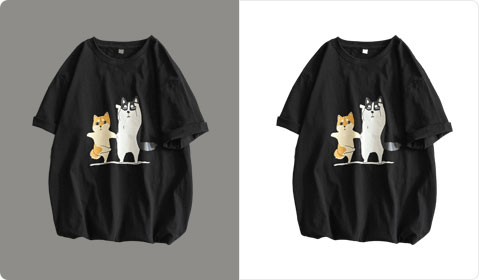
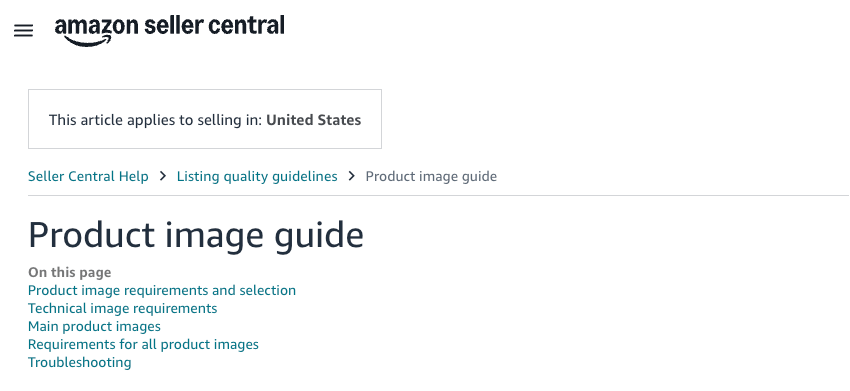
Marketplace listings requiring pure white
If you’re uploading to Amazon, eBay, or most major marketplaces, blur won’t pass QC. Amazon’s main product image requires a pure white background (RGB 255, 255, 255), per their product image requirements. For these, full background removal is the only compliant path — and trying to shortcut with blur just gets the listing rejected. I’ve seen sellers burn two or three revision cycles on this before realizing the platform’s auto-check doesn’t care how nice the blur looks.
Transparent PNGs for compositing
If the image is going into a poster, a banner, a video thumbnail, or any layered design, you need a transparent PNG — not a blurred one. Blur locks the subject into its original environment. Removal frees it for anything. Once you’re designing across multiple surfaces, that flexibility matters more than the nice atmosphere blur gives you.
My shortcut: if the image is the final output, blur is often enough. If the image is an ingredient in something bigger, remove the background instead.
FAQ
Q1: Will the subject edge look natural? On clean shots with decent lighting, yes. Tricky cases — flyaway hair, transparent glass, fine jewelry chains — may need a quick feather adjustment. Always preview at 100% zoom before exporting.
Q2: Can I adjust blur intensity after applying? Yes. The blur slider is non-destructive inside the editor, so you can tweak until it feels right. Once exported, though, changes need to happen on the original again.
Q3: Does it work on group photos? It does, but group shots raise the difficulty. AI has to detect multiple overlapping subjects, and edges between bodies can get soft. Works well for two to three people; beyond that, I’d check carefully and sometimes lower the blur radius so any small edge miss is less noticeable.
Q4: Can I blur video backgrounds too? Yes, though video is a separate workflow — edge stability across frames matters more than in stills.
Q5: Is there a free version? The web tool has a free tier for most basic blur tasks. Heavier use — batch processing, higher resolutions, commercial volume — moves into paid plans. I’d try it free first and upgrade only when you actually feel the ceiling.
Blur isn’t a lesser cousin of background removal. It’s a different tool for a different intent. Once you stop treating “remove everything” as the default and start asking what does this image need to say, the choice gets a lot easier.
Try it on your next product shoot or headshot — you might surprise yourself. And if you’re still unsure between blur and full removal, run both on the same image and look at them side by side. The answer usually shows up on its own.
Previous Posts:
Best AI Photo Editor by Use Case (2026): 7 Tools I Actually Tested
How to Animate Photo to GIF Online (Free, No App Needed)
How to Remove Background on iPhone in 30 Seconds (iOS 18, No App Needed)
Remove Background Online in Under 10 Seconds (No Sign-Up, Transparent PNG)
Face Cutout & Bighead Maker: Create Stickers and Photo Props in 1 Minute